How To Change Weed Eater String: Step By Step Guide
Often popularly known as a weed whacker, weed eater, line trimmer, or string trimmer, this multi-named tool is an essential instrument that needs to be in every lawn owners’ yard.
This practical tool is perfect for when your regular chunky lawn mower cannot reach some places. A weed eater comes in handy in such spots.
It is an ideal tool for getting near fence posts, shrubs, near a tree trunk, or even under your kids’ trampoline. This handy device has been gradually upgrading itself for optimum applicability.
Traditionally these weed eaters come in three variants: gas-based, electric cord-based, and cordless battery-based. Choosing the right one according to your yard’s size is step one of weed-cutting 101.
However, a string or line of the weed eater is equally essential, if not more. This string is the mechanism that helps cut the grass, weed or any unwanted greens from your yard.
The string is made of plastic wraps around the housing (the part that holds the plastic string and spinning wheel).
A good quality string would undoubtedly last you longer than cheap plastics that can melt right away. These weed-cutting strings usually come in single or double-line formats.
A single line will cut half as much as a double line. After using the trimmer for some time, you might notice that your weed eater stopped working as there is no string left.
It is essential to know how to change a weed eater string on such occasions.
Before you move to our step-by-step guide, there are a few essential things that you should know and understand about your machine to change the string.
Know-How Your Line Feeds
Four basic line feeding mechanisms use the string to cut the weeds and grass.
These functions can vary from model to model, but every model follows these basic line feeding type mechanisms.
Bump Feed Trimmers
A bump feed trimmer loosens the string after each push in the ground. You simply have to tap the bottom of the weed whacker on the ground to feed more lines for cutting.
Easy Feed Trimmers
These use the exact mechanism as the bump feed, but instead, you can control the string by pushing a button to get extra feed. It is easy and handy.
Automatic Trimmers
As the name suggests, these automatic trimmer heads automatically release the line as and when required.
It detects and starts to feed the line, so you don’t have to stop and push buttons or bump on the ground, resulting in uninterrupted cutting.
Fixed-Line Trimmers
These trimmers don’t follow the spooling mechanism and work with the idea of feeding individual lengths of line that you can simply insert one at a time.
People find these types of trimmers very time efficient as you don’t have to unwind and remove the housing part every time the string gets tangled or ends.
Changing The Line On A Single Line Trimmer
Let us have a look at this step by step guide to change the string of your weed trimmer:
Preparing The Right Line
It is of utmost importance that you choose the perfect string that will go through your weed cutter. If you buy a broader or thicker string, the string won’t go through the hole and will be of no use.
Always refer to your company’s instructional product manual. If you don’t have it handy on you, go to their website, and you will find the string’s right size according to the model.
Dialing customer care won’t be a bad idea either. After the correct selection, try cutting the appropriate length of the string. It can vary from 10’ to 25’.
If you are not sure about the length always cut a little extra as it is easy to trim it later than to trash away from the whole spool because of the small length.
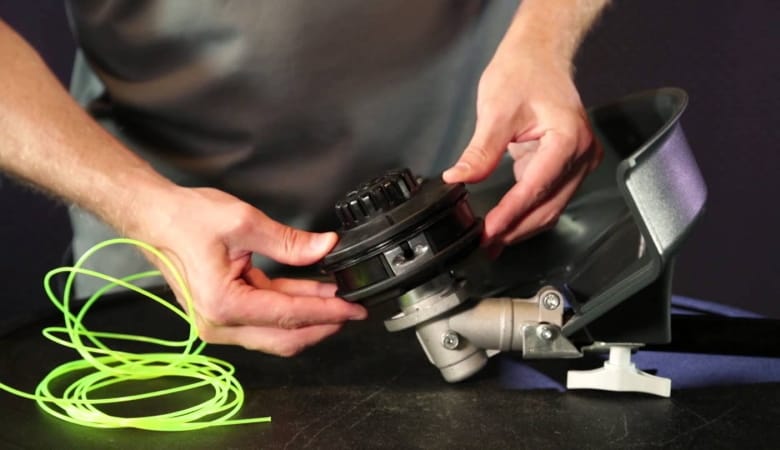
Removing The Retaining Cap
Ensure your whacker is cooled down. It will prevent your hands from burning. Removing the retaining cap from the trimmer head involves pressing one or multiple side tabs or unscrewing it.
It depends on each model, but it’s relatively easy to figure it out; ultimately, you are just opening a cap.
Find The Starter Hole In The Opened Spool
After you find the starter hole, which will be in the middle of the spool, insert the tip of your string in the hole and look for an imprint of arrows on your spool.
Start wrapping the string in the direction of that arrow.
Sometimes, a company can give these arrows at the bottom side of the cap, getting worn down. In that case, try wrapping the wire in an anti-clockwise direction.
If you do it in a clockwise direction, it will come right off as soon as you start the engine. You don’t want to jam the part later and avoid trying to wrap the string in a neat line.
After you see a good 5’ or 6’ line remaining, snap it into the retainer so that it holds the string in place.
Attaching The Spool To The Trimmer Head
Hold your spool in such a way that the retainer side of the spool lines up to the exact slot of your cap head. Remove your string from the retainer and feed it through the slot.
After you are done, reattach the retaining cap.
Have a productive day of weed cutting!
Changing The Line On A Double Line Feeder
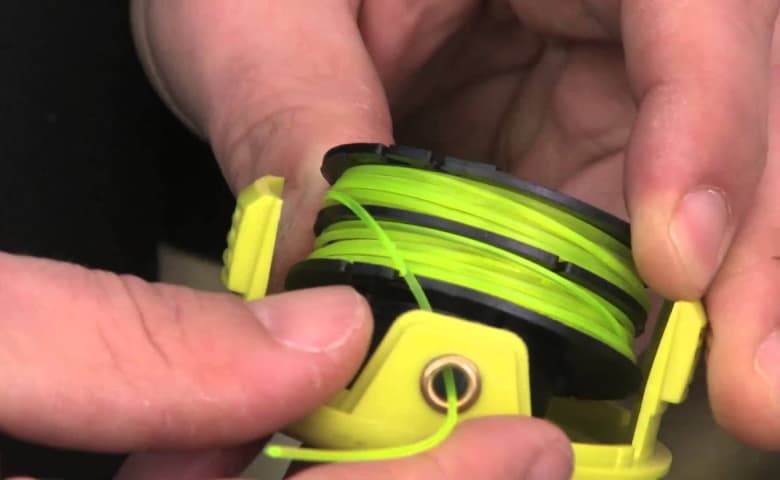
Wrapping The Strings
When doing a double line feeder, there will be two holes instead of one thing to keep in mind. There will also be a separate wall to control these two strings away.
Insert the tip of the strings and start wrapping the line. After you have reached the mark of 6’ of line, attach it to the retainer. Follow the same process for the second string bundle.
Attach it to the other end of the retainer. At this point, both the strings should come opposite to each other. If you see them against each other, you are on the right track.
Reattaching The Retaining Cap
Quickly remove both the lines from the retainer and feed them through the eyelets on the outside of the trimmer head.
Replace the spool and pull both the lines at the same time to see if they are working smoothly. Attach the retaining cap, and your weed mover is ready to mow away the pesky weeds!
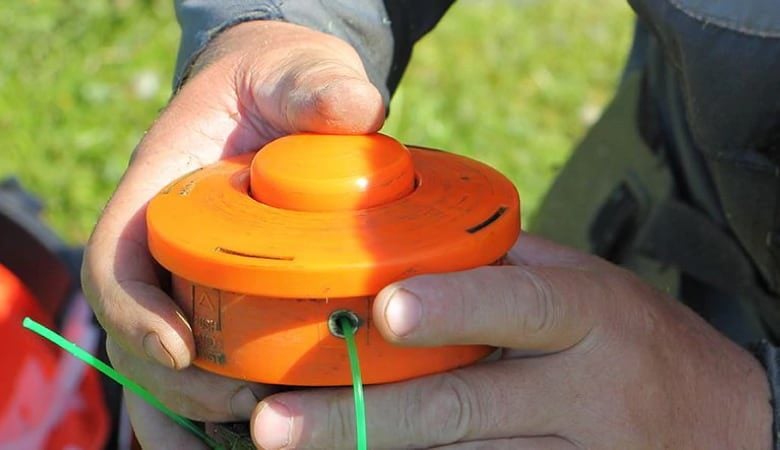
Changing The Line On The Speed Feed Trimmer
Repeat the same process from step 1 and 2
Aligning The Arrows
Since a speed feed trimmer doesn’t require opening and closing the cap, it becomes comparatively easy and fast to feed.
You need to rotate the cap so that the arrows that the company pointed should align with the eyelets. Once you are done with that, you will see the light coming from the eyelet.
Which means the eyelet is ready to feed in the string. Take your long string and insert it through one eyelet. It should come out of the other in few seconds.
Twisting It In Place
Pull the string swiftly, ensuring both ends are of the correct size. Once done, hold the cap and twist the head in a clockwise direction. You should stop after you see 5’ or 6’ of string at the end.
That’s it! Your mighty weed warrior is ready to weed out the weeds!
How To Choose Best Trimmer Line For Your Weed Whacker
String Size
Understanding your week whacker’s sweet balance of efficiency and size limit is very important. Most string trimmer heads can hold up to .095 in size.
Usually, string size ranges from 0.50 to .200+ inches.
Below is a size comparison to understand different size ranges:
- Lightweight to medium string generally ranges from .050-.08 inches.
- Medium to heavy string generally ranges from .08-.105 inches.
- An absolutely robust and very heavy-duty string is easily above .105 inches.
String Shape
You might think, ‘what difference is a shape going to make?’ But truth be told, the shape determines how well the grass and weed get cut and how efficiently it gets cut.
We will cover all the shapes, so when you go out to buy it next time, you will end up buying the best string for your machine.
Always refer to your company’s guidelines to see if the string is compatible with your device or not.
Round Trimmer String
This standard trimmer is the perfect choice to make if your yard has a regular weed and grass cutting requirement. The standard shape ensures lesser wear down as compared to other shaped strings.
These lines are perfect for residential use with minimum weed. It is also one of the easiest lines to insert in the machine because of the round, smooth shape and no edges.
Some examples of round trimming lines are Shakespeare, Red Gatorline, and Magnum Gatorline.
Serrated Trimmer String
A serrated string is a good option if your property has a lot of weeds or if you require it for a commercial job.
The serrated edges like a kitchen knife cut through thick weeds like butter while very quickly covering the area. The trim is comparatively cleaner.
If you have any medium or heavy job, this is a perfect shape to go to. A great example of serrated trimmer string is Oregon flexiblade.
Multi-Sided Trimmer String
Again an excellent buy if your requirement is for a medium to a heavy job. These lines come in various sub shapes like a square, pentagon, or star.
These strings cut heavy grass pretty quickly, but they break easily if they contact fences, curbs, sidewalks, or stones.
Some good quality multi-sided trimmer lines are Nylium Starline and Weed trim line.
Twisted Trimmer String
A twisted trimmer is perfect for very thick and heavy weeds and grass. This type of line adds strength, efficiency and doesn’t make a lot of noise.
It is a modern version of a round line. An excellent alternative to a round string if you are looking for something that doesn’t make a lot of noise.
Some examples of twisted trimmer strings are Platinum Gatorline and Maxpower.
Tips To Make Your Weed Whacker String Last Long

Tip #1
Using a weed whacker correctly will increase the life of your string. Stop overfeeding the string. If you keep on tapping, the string will simply keep coming, and it will get finished quicker.
Try to understand when to push the string for a new line and avoid it.
Tip #2
Get a bigger spool of string. It is a reasonably common tip, but sometimes we might be too busy focusing on the string’s width that we forget the spool size.
If you buy a big spool, it will save you time and effort to restring the line every once in a while. Get the longest spool that your machine can fit and forget about restringing it again and again.
Tip #3
A thin wire can compromise the cutting efficiency, but at the same time, if you buy a thick wire, that might slow down the machine.
Tip #4
While we are at tips, consider wearing safety glasses before starting the trimming. Keep a safe distance from the line while the motor is on. It gets pretty sharp.
Wrapping Up
That’s it. Feel free to use the suggestions mentioned to buy the right string. After purchasing the string, the step-by-step guide makes it extremely easy to follow the process.
Happy weed whacking!
Resources