Complete Guide: How to Grow a Tree
Trees are an asset and an investment. How well that investment develops depends on several aspects, including the type of tree to be planted, its location and setting, and the aftercare provided. Getting your brand new tree off to a strong start will assist the tree in developing to its full size and guarantee that it will provide social, environmental, and economic benefits throughout its life.
In this article, we will advise you on how to plant a tree in its new location after it has been uplifted. We will also be going through what times are best for planting trees and what stress trees go through!
Follow through with all the steps, and you’ll have a happy, healthy tree in no time!
When to Plant:
Sleeping seasons, the fall and early spring are perfect times to sow new plants. Make sure that the weather conditions are calm and allow ideal time for the new trees to establish their roots in the new site before the summer heat and spring rains encourage new top growth.
Healthy containers or balled and bur lapped trees can be sowed throughout the cultivating season. In places where trees grow all year round, in subtropical and tropical climates, any time is a great time to plant a brand new tree as long as adequate water is accessible.
Planting Stress:
Transplant distress in trees is a state of reduced vitality and slowed growth following transplanting and can heavily affect burlapped and balled trees. This stress can cause them to lose a significant part of their root system when excavated at the nursery. Container plants can also experience transplant distress. Proper site grounding and preparation, careful treatment to prevent extra root damage, and reliable follow-up care promotes faster recovery and decreases transplant shock.
How to Plant a Tree:
Carefully follow these steps to help your plant quickly establish its new location after up-rooting.
- Dig the planting hole:
First and foremost, remove the tree from the container and asses the root ball. The root ball is the mass of roots and soil that comes out of the tree container. You must measure the root ball with your shovel to guess the depth to dig.
Dig a broad and shallow planting hole. The planting hole must only be as deep as the root ball and 2-3 times as wide. The root flare must remain above the surface of the earth. The root flare is where the tree trunk widens and becomes the tree’s root. To avoid air pockets below the tree, fashion a small heap of soil in the base of the planting hole and compress down, i.e., press firmly over the earth but do not over-compact it. This will stop the tree from relaxing.
The trunk flare is where the tree trunk expands at the base. You must ensure that the trunk flare is partly visible after planting the tree. Remove surplus soil before planting if the trunk flare is not noticeable.
- Trim the roots and detach the nursery stake.
We have discovered that this step is vital to healthy tree performance. Tree roots should idyllically spread out straight from the middle of the root ball. You should lay the tree on its side and place the root ball on a canvas or a tarpaulin. Then work your gloved fingers into the root ball deeply to release and unrestraint the roots.
Cut off any rotating roots to prevent girdling. Girdling is when circling roots get more extensive and grow around the bottom of the tree. They cut off the nutrients and water to other parts of the tree, damaging its health. This is a great time to cut the green binds that tie the tree and remove the nursery rod.
If the root ball and trunk are wrapped, remove the cover to enable and accelerate root growth. Remove the wire basket or just cut a couple of rings off, so it stays low-profile and does not restrict future root growth. Examine the tree root ball for enclosing roots and cut, remove, or straighten them. You can also uncover the trunk flare if required.
- Place the tree in the middle of the planting hole:
The tree usually has only one chance to be planted correctly, so ensure the position and depth are precise before sealing in the soil. The root flare should rest above the earth. If it is etremely high or too low, take the tree out and remove or add soil as required. Turn the tree until you find the best location to keep the bigger branches away from buildings or walkways.
Hold the tree erect and fill the planting hole with soil around the tree root ball. Before filling the hole with soil, have someone inspect the tree from several perspectives to confirm it is straight. Gently compress the soil down around the root ball with the toe of your shoe or a shovel to eliminate any air pockets. Do not step straight on the root ball, which will compact and damage the roots.
Place the tree at an appropriate height. When positioning the tree in the hole, lift it up by the root ball, not the stalk. The majority of roots of trees develop in the top 30 cm or 12 inches of soil. Planting the tree too deep can prove to be harmful to it.
- Build a soil berm:
A soil berm is a heap of soil encircling the tree. It is around 10-12 inches from the tree trunk and creates a bowl or basin that holds roughly 10 gallons of water. The inner part of the berm must start at the outer border of the root ball. It is essential to keep the root ball moist until the tree is formed.
Fill the planting hole gently but securely. You should also pack soil around the bottom of the root ball to steady it. Fill the hole tightly to remove any air pockets. You can further lessen the air pockets by occasionally watering while backfilling. You must not fertilize when planting the tree.
- Stake the tree:
Two stakes are generally used to help a young tree grow horizontally until the roots have been established. In yards and parks, three stakes shield the tree from stray lawn mowers.
Place the sharp end of the stake firmly on the earth, around 8 inches away from the tree trunk, and hold it up straight. Prop the top of the stake over to slide the stake utensil onto the stake. A stake pounder is a heavy tool with two knobs that fit over one stake’s end. Always wear a hard cap while using it. Pound the stake into the ground until it is firmly set, and you can easily detach the tool. Remove the pounder from the stake using extreme caution. Repeat with the other stakes spaced evenly around the tree.
If staking is essential, underground systems also provide optimum sustenance. Research has shown that trees develop stronger roots and trunks if they are not stalked, but stalking may be mandatory when planting on windy sites or bare root stock. You can remove the stakes after the initial year of growth.
- Tie the tree.
Tree ties should be positioned at the lowest place on the trunk where the plant can be held horizontally, generally around 4 feet from the soil. Steady the trunk at the area you plan to tie it. Ensure that the tree should be standing straight and not leaning. Make a figure 8 pattern with the tree tie, one loop around the tree and the other around the trunk. Nail the edges of the ties together into the stakes.
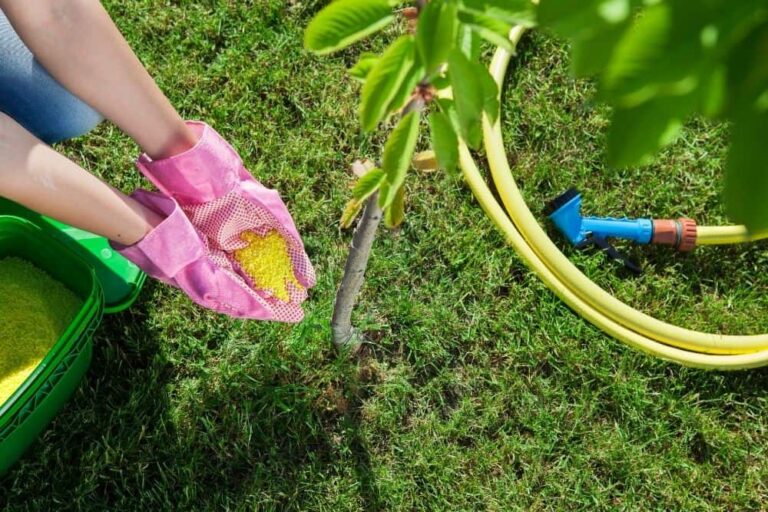
- Water the tree!
Fill the basin around the tree with water and strengthen the berm if required. Continue watering at least once a week, if there has not been rain until the tree is established.
- Add Mulch.
Cover the soil 2 to 3 feet around the tree’s base with 3 to 5 inches of mulch. Mulch is a mixture of leaves, wood chips, or shredded bark. It helps to improve soil composition, retain moisture and suppress weeds. It would be best if you keep mulch at least 2 to 3 inches from the root flare and trunk of the tree to prevent rodents and insects from digging in the mulch and munching on the bark.
You must be sure not to heap a lot of mulch right against the tree trunk. A mulch-free area 1 to 2 inches wide at the tree’s base can prevent decay and reduce moist bark.
Provide follow-up care:
The soil must be kept moist by barring rain or watering at least once a week and more frequently during windy or hot weather. Continue watering until mid-fall, gradually reducing as lower temperatures do not need frequent watering.
Preserve trees and conserve water by following these guidelines.
Young trees need regular watering for disease prevention and good health. Deep watering prevents weak, shallow roots from developing and urges the growth of healthy roots under the tree, inside the ground. Be sure to check the soil moisture weekly, around 4 to 6 inches below the surface of the tree. The soil must be moist, not wet.
Look for signs of drought stress. Drought stress can make the leaves wilt, yellow, curl or brown at the edges.
Weeds and other plants compete with the tree for nutrients and water. Keep the tree base free from other plants such as grass or weeds.
Use mulch to preserve moisture and suppress weeds. Cover the soil starting a few inches at the base of the tree trunk with a 3 to 5-inch layer of mulch and spread a couple of feet from the tree in every direction. It should create a circle around the tree.
Protect your young tree from any chemicals. Herbicides and pesticides can damage or burn a young tree’s leaves and roots.
Other follow-up care you should consider are:
• Minor clipping of the tree branches, damaged during the planting process.
• Prune carefully after planting. You should delay corrective pruning until after an entire season of growth.
• If trunk covering is essential, use decomposable materials and wrap the tree from the bottom.
We also advise you to consult your local garden center or tree care professional for assistance regarding your tree plantation.
Right Tree at the Right Place:
Proper tree positioning can enhance your assets and prevent costly repairs and maintenance in the future. Consider driveways, utility lines, and the sidewalk when choosing a location. A tree care professional, a local arborist, a local nursery, or a utility company can help you with proper tree positioning.
Mulching
Mulching is one of the great practices you can use for better tree well-being. Mulches are spread on the surface of the tree soil to improve soil conditions and maintain moisture. Although, if mismanaged, mulch can have little, or even a bad, impact on your tree.
- The pros of proper mulching are:
- Prevents soil moisture loss through evaporation.
- Manipulates weed growth and germination.
- Insulates the soil, protecting tree roots from extreme winter and summer temperatures.
Overhead Lines:
Overhead utility wires are easy to locate; however, they are often disregarded. Planting tall-growing trees near or under these lines ultimately necessitate your utility provider to clip them to maintain a safe distance from the wires. This trimming may result in the tree having an odd appearance. Routine pruning can also lead to a reduced life span for your tree.
Underground Lines:
Trees comprise much more than the trunk and leaves we see above ground. In many cases, the root area of the tree underground is much larger than the branches. Sewer, electric, water, and gas lines installed below the ground can be bargained by tree roots. The greatest danger to these utilities occurs during the plantation process. Accidental tunneling into the utilities can cause costly repairs or even result in injury or loss of life.
Now that you’re aware of how to plant a tree and what safety measures you should observe, go and make the environment green!