How to Get Garlic from Cloves
Growing garlic from cloves tends to be much simpler than growing garlic from seeds. Choose the biggest cloves from previously grown bulbs or those from a trusted supplier. Plant your cloves in the fall for harvest the following summer. Garlic cloves should be planted in a loose, well-draining soil a few inches apart.
Create a mulch layer over the garlic cloves and soil to protect them through the winter months. Keep the mulch layer moist, fertilize once or twice through the season, and pull weeds. In the summer, scapes should begin to brown and you can harvest your garlic.
Choosing the Best Varieties & Cloves
The best garlic cloves to plant are usually those from your previous harvest, if you have some. If you plan to grow garlic annually, save the largest bulbs from your harvest each year specifically for planting.
If you do not have a previous harvest, order bulbs from an online seed supplier or your local farmer’s market rather than purchasing from the grocery store.
Inspect each bulb for signs of disease, mold, or other disturbances that can affect this year’s harvest. You should also check for bruising, cuts, and damage to the wrappers. Any of these can affect the reproduction of the cloves.
The best varieties to plant depends on the region you live. Warmer climates tend to grow softneck varieties better, whereas colder climates can fair well for hardneck varieties of garlic. Also, consider the size of garlic cloves you want to plant. Softneck garlic cloves produce smaller bulbs with small, but several, cloves. Hardneck varieties product larger cloves, but fewer of them.
Choose the biggest and healthiest cloves from each bulb to plant. Smaller cloves can be used for cooking.
When is the Best Time to Plant Garlic Cloves?
Fall is the ideal season for planting garlic, but it can sometimes withstand conditions if planted earlier or later in mild climates. The Old Farmer’s Almanac recommends planting in the fall about six to eight weeks before the first winter frost.
This will yield the biggest, healthiest bulbs for harvesting the following summer. Gardeners in most areas can plant garlic between October and January.
How to Prepare Your Garlic & Garlic Bed
Before planting garlic, you need to prepare your seed. Garlic needs to go through a cracking process to separate its cloves from the garlic stem. To crack your garlic, gently press on its head with the palm of your hand.
The cloves should separate. Gently pull each one, making sure to leave as much of the wrappers on the cloves as possible and the brown base on each clove intact.
Separate the biggest cloves from the smallest. The bigger cloves are the ones you’ll want to plant.
Then, prepare your garlic bed by mixing soil with a nitrogen source, like a fertilizer with added nitrogen. Make sure the soil is loose, well-draining, and in a sunny location.
If you don’t have a well-draining area, create a raised garlic bed about eight inches high. Remove any weeds, rocks, or other disturbances from your garlic beds before planting.
Create furrows about two to three inches deep for your garlic cloves to be planted in. This aids in spacing your garlic and keeping them uniform within the soil.
Planting Garlic Cloves
Garlic cloves should be planted into each furrow with their pointed ends up and base ends down. The pointed ends are where your garlic cloves will begin to sprout. Space each clove between six to eight inches apart within each furrow. Spacing them closer together can result in competition for water and nutrients as your cloves reproduce into bulbs.
Once you’ve planted all your cloves, use your hands or a rake to carefully move the soil back over each clove. Make sure you fill in all the holes and leave the soil loose on top for adequate airflow and growth.
Caring for Your Garlic Cloves
Once garlic cloves have been planted, they don’t need significant, timely maintenance. But, they do need an adequate water supply, plenty of sun, and nutrients from a fertilizer.
The best way to keep the soil moist for garlic is by using mulch. A thick layer of straw mulch works well to keep soil moist and the ground at the right temperature. Once you lay down your mulch layer, water it until it’s moist, but not wet.
Check your mulch in a couple of weeks after planting your cloves to ensure that your garlic sprouts are not stuck under the layer. If they are, gently pull them free through the mulch and pull up any weeds that may have sprouted.
Once your sprouts begin to emerge in the spring, cut off the flowers from them to prevent your bulbs from decreasing in size, as these flowers can steal nutrients from the bulbs. You should also remove your mulch layer once spring has come and the frost season is over.
You can use a fertilizer with nitrogen sparingly through the growth process. If you begin to see yellowing of the base of the sprouts, this is a good time to fertilize.
Harvesting Garlic Cloves
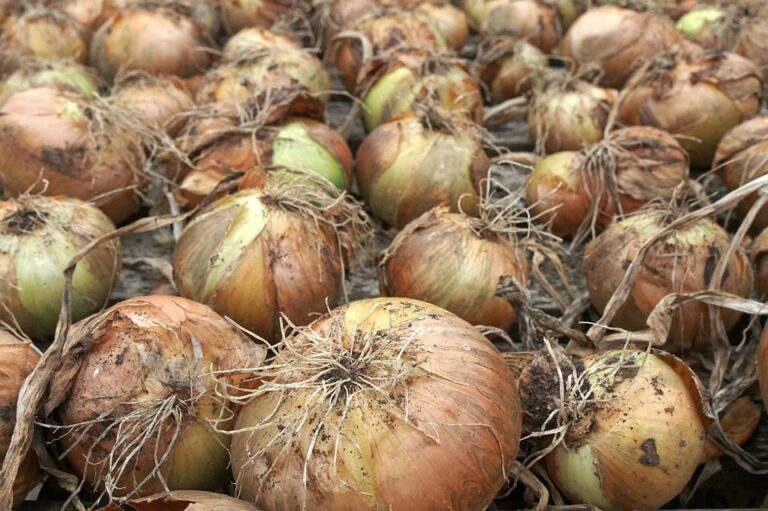
Your garlic cloves have grown into mature bulbs once you begin to see the scapes die off. The first few inches of the bottom tend to brown first, and browning will continue up the scape. Once they’ve died off completely, you should have a mature, read-for-harvest bulb supply.
To harvest your new garlic, use your hands to move the soil around the base of the scapes. Continue moving the soil until you expose some of the bulb. Your bulbs are very fragile, so take care when lifting them from the ground to not remove the wrappers, bump, or drop them.
Once you’ve pulled out the bulbs, lay them outside in a warm and dry location for a few hours. This will help dry up any soil left on the wrappers and dry the bulbs in preparation for storage.