Harvesting Garlic the Right Way
Harvesting garlic is a simple process, but it’s important to harvest at the right time. Garlic has a window of a few days once its scapes begin to change color for it to be harvested.
To harvest garlic, gently move the soil around your bulbs until they are mostly exposed, and carefully pull on the scapes. Allow garlic bulbs to cure, or dry, for two weeks in a dry, shaded, airy location. To store garlic for long-term use, you can braid the scapes and hang the bunch of bulbs, or keep them in a mesh bag in a cool, dark storage location.
When to Harvest Garlic
A specific time to harvest garlic depends largely on the season in which you planted it. If you planted in the fall, you may be able to harvest your garlic within six to eight months. However, spring-planted garlic may take longer because spring soil conditions are usually not optimal for growth.

Checking Garlic for Maturity
The first sign of harvest readiness for garlic is the yellowing of its leaves, or scapes. The base of garlic scapes begin to turn a yellowish-brown as the bulbs become closer to harvesting. At this point, you should stop watering your soil to allow the bulbs to begin drying out and prevent possible rot. After about half the scapes turn color, your garlic could be ready to harvest.
At this point, you can also check a bulb or two to see if its size is optimal for harvesting. Gently dig up some soil around a bulb and check its size. If it still looks small, it may need a few more days.
If it’s big in size and a few of its wrappers have begun to decompose, it’s ready to harvest. Be vigilant, though, because garlic usually has a window of just a few days to harvest before the wrappers begin to fall off completely and stop protecting the bulb.
How to Harvest Garlic
The first thing to remember when harvesting garlic is to handle it carefully. It’s extremely fragile because of its husky wrappers. If these come off, your garlic bulb will not be protected during its curing and storage process. If you bump or drop your bulbs, you can cause bruising. This will lead to early decay of your bulbs.
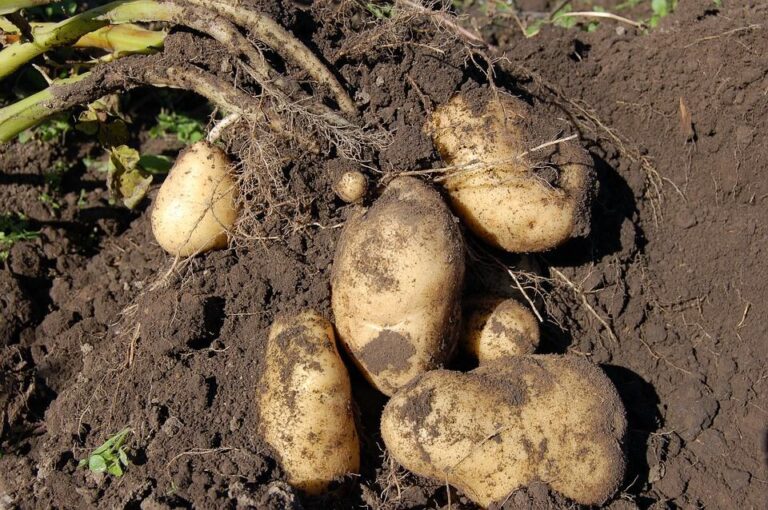
Carefully dig around your bulbs with a gardening fork or, even better, your hands. A fork or shovel risks poking or breaking the cloves, which will ruin your garlic bulbs quickly. Move the soil until you exposed the majority of the bulbs. Then, gently pull up from the scapes to pull the bulbs from the ground.
What to Do After Harvesting Garlic
After harvesting, gently brush off loose soil from each bulb. Be careful not to bump off any of the skin from the bulb. You can also gently spritz the bulbs with a small amount of water to remove excess soil.
Leave the roots and scapes on the garlic if you don’t plan on using them right away, as they’ll help with the curing process. The bulbs will continue to utilize the water within them as it evaporates. If you’re using any of your garlic the same day, you can trip the scapes and roots.
How to Cure Garlic for Storage
Garlic needs to go through a process called curing after it’s harvested. This helps them dry out to prepare them for proper storage.
Once you pull up your bulbs, quickly get them out of the sun. Your garlic should be placed in a dry and shaded place with access to airflow. If you’re laying them down, rather than bunching the bulbs together, lay them side by side to allow plenty of air to each bulb.
Alternatively, you can bunch the bulbs together and tie them at their stems. Bunch small amounts together so they’ll have more air exposure. Then, hang them up in a dry, shaded area. If the area doesn’t have good airflow, it’s suggested to use gentle fans to aid in curing.
Some gardeners choose to braid garlic to make it more visually appealing during the curing process. Gardenerd created a simple tutorial video to show you how to braid garlic to hang in your kitchen for curing.
After Garlic Cures
After garlic cures for about two weeks, you’re ready to prepare it for storage. Make sure your wrappers and roots are completely dry to ensure completion of curing.
First, “clean” your garlic by removing the outer layer of wrappers, which likely still have some soil on them. Then, trim off the scapes. Leave a small amount of stem so you can easily crack the garlic when you need to use it. Next, gently rub the roots with your hands to knock off extra soil. Trim them to about ½ to 1 inch long.
How to Store Harvested Garlic
If you like the decoration idea of having your harvested garlic displayed in your kitchen, you can simply leave your braided garlic intact after curing and move it into your kitchen after brushing off its dirt and trimming the roots. Try to keep the braid in an area of your kitchen that’s cool without a lot of sun. Garlic braids are best for garlic that you’ll be using quickly.
If you have a lot of yield from your harvest and want to store it for long-term use, choose a cooler and darker place for your garlic, like a storage room or pantry. The optimal temperature for storage is between 32 to 40 degrees Fahrenheit, and the area should have a small amount of humidity and air flow. Like you did with curing, use gentle fans if needed.
You can store your garlic in mesh bags so they can receive proper airflow. Or, keep even your long-term harvest in garlic braids to keep in your storage area.
Photo by downtowngal released into the public domain.
Instead of focusing on a specific timeline to harvest garlic, it’s best to learn how to check your garlic for signs of maturity to better gauge when it’s ready for harvest.