Properly Caring for Your Spider Plant
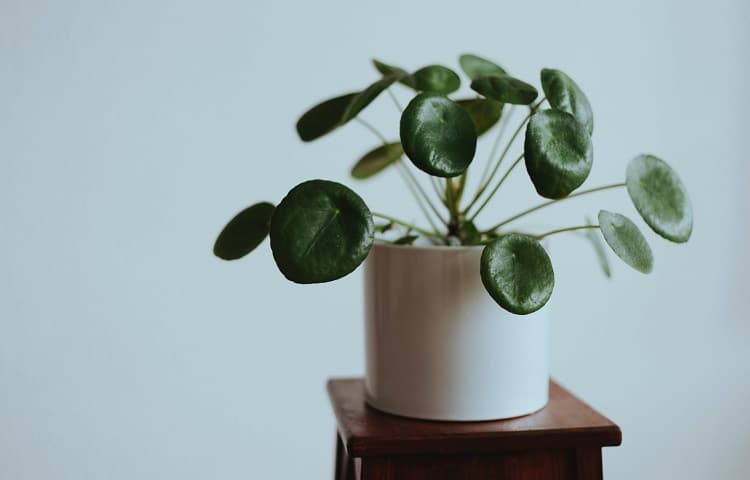
Originating in South Africa and the South Pacific, Spider Plants (Botanical name: Chlorophytum comosum), get their common name from the spider-like plants, which hang down like spider’s webs from the central plant. Considered one of the easiest plants to grow and propagate, the spider plant is at home in average and warm climates. Indoors, it’s one of the best plants for hanging baskets. Outdoors, it looks great as a border around garden beds and walkways.
Growing Spider Plants
The Chlorophytum comosum also banishes formaldehyde, carbon monoxide and other toxins from the air, so it’s a safe and attractive tool to keep indoor pollutants in check.
Growing Conditions
A fast grower, the Chlorophytum comosum has green leaves with white edges – or vice versa, as there are several varieties. All types create “babies”, or plantlets, on their long stalks. These spiderettes will grow out, giving the plant a distinctive look while simplifying propagation.
The Spider Plant flourishes in an average room temperature of 65-75 degrees F, but don’t leave it in temperatures of under 50 degrees F. This plant will thrive in low humidity either indoors or outdoors. If you live in a tropical climate with high outdoor humidity, you may want to keep your Spider Plant indoors.
If your plant’s leaves turn brown and brittle, mist the plant as needed by spraying it with room-temperature water. You may want to buy a small room humidifier, or group it with other foliage. A group of plants placed together will emit moisture and raise humidity. (source)
Keep soil slightly moist. Use store-bought soil mixtures made for African violets or hydroculture mixes (for plants grown in rocks). A homemade mix of equal parts peat moss and vermiculite or perlite will also ensure healthy growth.
Growing Outdoors
Although spider plants are best known as an indoor plant, you can grow them outdoors in a warm, tropical climate. If you live in USDA Hardiness Zones 9 to 11, you can plant Chlorophytum comosum as a perennial in your garden, or leave a potted plant outdoors year-round.
In cooler climates, bring the pot outdoors in the spring and summer or plant as an annual in your garden. Dig up and pot spider plant annuals and bring them inside for the winter.
Pruning
Prune your plants to keep them at a manageable size. (They can grow up to three feet long and three feet in diameter.) Pruning helps reduce the watering and fertilizer requirements for a single plant, as the babies can be removed and turned into fledgeling plants.
Cut foliage at the base of the plant and get rid of dead or diseased leaves, including leaves with severely damaged yellow or brown tips. Remove spiderettes by snipping long stems back to the base.
Chlorophytum comosum typically does well unless tightly pot bound. Remove rhizomes or white tubers if the pot’s getting a little crowded. When you have a severely pot bound or overgrown plant, repot the plant in a slightly larger container after pruning the roots.
Repotting
Spider plants grow quickly, and their roots can overflow and even crack the bottom of flower pots. Repot an overgrown plant by carefully removing it from its original pot and trimming superfluous roots. Make sure the new pot has good drainage holes.
Fill the bottom of the pot with a layer of African violet or hydroculture soil mixture or a soilless mixture containing peat moss. Place the plant on top of it, ensuring roots are firmly in the soil. Add soil and pack it around the roots. Water and care for the plant as usual.
Light and Watering Requirements
The Spider Plant likes bright sun, but keep it out of direct sunlight, especially during midday. Bright, direct sunlight scorches its leaves.
Water moderately during the growth stage, and occasionally once the plant matures. Use distilled water or rainwater; fluoride in tap water may harm the plant. Over watering causes sogginess and root rot, so let your plant dry out between waterings.
Get more tips on proper watering from Plants for Peace in the video “Watering Your Spider Plant” from the Ivy Rose YouTube Video Channel.
https://youtu.be/fp9ia7VYUXM
Fertilize every two weeks in the spring and summer with a liquid houseplant fertilizer diluted by 50 percent. Don’t feed your plant during the winter.
Planting and Propagating
When spider plants mature, they develop plantlets, also called stolons. Cut off a stolon on the end of a spider plant runner with clean scissors. Then you can root the stolon in water or a pot with fresh soil. Rooting the plantlet in water causes the small roots to develop further. Once larger roots form, transfer the plantlets to potting soil. It’s important to keep water clean and place the cuttings in a shallow vase or bowl. Putting the stolon’s in deep water causes them to rot.
To root the spiderette in soil, use a standard-grade potting soil and a pot with drainage holes at the bottom. Stick the roots in the soil, and make sure there’s humid air surrounding the plantlet. A soil mix containing peat moss, perlite and vermiculite placed in a propagation box will ensure more humidity. You can also place the spiderette in or near the bathroom or laundry room, so it will receive more moisture from the air.
Watch a step-by-step tutorial on how to propagate Chlorophytum comosum in the video “How to Propagate Spider Plants” with University of Illinois horticulturist Richard Hentschel, from the UI Extension YouTube Channel.
Pests and Diseases
The Chlorophytum comosum is prone to tip burn from fluoride and salt found in tap water. Change to distilled water or rainwater if you discover tip burn, and check to make soil is slightly moist, as dry soil is another factor in tip burn.
Outdoor spider plants can attract scale, whiteflies, aphids or spider mites. Spray the foliage with potassium-based insecticide soap to remove pests. Never use a higher concentration than recommended on the label, as it can damage plants.
It’s safe to use your fingernail to remove the residue from brown discs on the leaves every few days.
Photo by madaise licensed under SA-BY ND 2.0