The Perfect Time to Harvest Onions
Now everyone knows what an onion is. But let’s go into a bit of detail about what onions are. In this article, you will learn what onions are, what time is perfect for picking them, the different varieties, and the diseases you have to look out for when planting them.
So let’s get started!
Onions:
Onions, or Allium cepa, are bulb-shaped root vegetables that grow below ground. Also known as common onions or bulb onions, they are produced worldwide and are directly related to shallots, chives, leeks, scallions, and garlic.
Onions also have several health benefits, mainly due to their high content of sulfur-containing amalgams and antioxidants. They have anti-inflammatory and antioxidant effects and have even been linked to decreased cancer risk, improved bone health, and lower blood sugar levels.
Onions are more commonly used as a side or flavoring dish. They are a staple food in several cuisines worldwide. They can be grilled, baked, fried, boiled, powdered, sautéed, roasted, or even eaten raw.
Onions vary in color, size, and shape, but red, white, and yellow are the most common. The taste spans from sweet to spicy and sharp, depending on the season and variety. Onions can also be eaten when immature before the bulb reaches its full size. They are then called summer onions, scallions, or spring onions.
Planting, Growing, and Picking Onions:
Onions are unexpectedly easy to grow! They are sowed early in the spring and picked from midsummer throughout the fall. Whether you start developing your onions from sets or from seed, there are some tricks and tips of the trade that make a great difference between an impressive crop and a dissatisfactory one. Read below to see how you can plant, grow, and harvest onions!
Should I Grow Onions from Sets or Seeds?
Most people and farmers prefer planting onion sets over sowing them from seeds only because the sets establish rapidly and are easier to instill.
Onion sets are small onions that develop in around 14 weeks. They can endure light freezes and have a greater success rate than transplants or direct-sown seeds. The onion sets appear in the form of small bulbs and can be bought from gardening stores. Once the tiny bulbs mature, they develop into full-size onions. When choosing, make sure to get onion sets with bulbs three-quarters of an inch in width; larger ones are inclined to produce stiff necks and go to seed.
Starting onions from the seeds is doable and can even be necessary when planting in colder regions. Onions produced from seeds need the soil to be at least 50°F to sprout properly, so seed onions should be started inside the house for about six weeks before relocating them to the garden.
Be sure to practice crop rotation with the onions. Don’t show them in the exact location every year, as this might foster the spread of ailments that affect the crop.
Planting:
It is essential to choose a place with full sun; somewhere, your onions won’t be covered by other plants. The more strength and sunlight they can get from the sun, the bigger their bulbs will grow. Mix aged compost or manure into the soil in early spring or fall to increase consistency. Ensure there is no debris or rocks. Soil needs to be loose and well-draining; compressed soil affects bulb development.
Time to Plant Onions:
In the beautiful spring weather, plant the onion sets outdoors once the ground can be operated on, usually during late March or early April, when the temperatures are less likely to dip below -2°C or 28°F.
In the spring season, you can start onion seeds inside for about six weeks before relocating them into the ground, after the soil is at least 50°F.
A fall-planted yield of onions needs between 4 and 6 weeks of warmth to become stable under the ground. They will stay sleeping during the cold season. As the soil and temperatures warm again come early spring, the onions will return to life and start growing again.
How to Plant Onions:
Onion plants are hefty feeders and need constant sustenance to produce big bulbs. During the plantation time, add nitrogen stimulants. Many organic farmers or gardeners will insert an inch of compost into the base of each row before planting the onions. You can even dig a channel in the soil about a couple of inches deep and around 3 inches wide and fill the ditch back in with around an inch of manure.
You should bury the onion sets around 2 to 6 inches apart. Gently press them into the loose soil only about an inch deep. Use closer spacing if you want to pick immature onions as scallions.
Space relocates around 4 to 5 inches away from each other and rows about 12 to 18 inches from each other.
Set the onion bulbs with the pointed end up. Again, remember not to bury them more than an inch under the ground. It’s essential to remember that you should not plant the onions too deep, or this can influence bulb development.
Mulch the area between rows with straw to stifle weeds and help retain moisture.
Growing:
The immature bulbs should stay covered with lightweight mulch to shield them, allow air circulation to retain moisture, and suppress weeds. Do not cover the developing onions. Cover only the immature onion bulbs.
You should fertilize the ground every few weeks with nitrogen to get more giant bulbs. Discontinue the fertilizing when the onions thrust the ground away, and the bulbing course has started. Do not push the soil back over the onions; the onion bulb must appear above the earth.
Usually, onions do not need constant watering if little mulch is used. About an inch of water per square foot every week, including rainwater, is adequate. If you want to harvest sweeter onions, then you can water more. To dissuade bolting, you must water more often during hot weather.
To discourage thrips, intercrop your onions with carrots or tomatoes in closely interchanging rows.
Recommended Varieties:
Onions are photoperiodic, meaning they are sensitive to daylight, so various types have been reared for varying day spans. The edge between short- and long-day assortments lies roughly 36 degrees north latitude. North of this location, you can plant the long-day types. And you can plant the short-day onions south of it. You can also try intermediate or day-neutral varieties, which produce an excellent crop anywhere, regardless of day spans.
Long-day varieties:
‘Yellow Sweet Spanish’: yellow-white color; large, round shape.
‘First Edition’: creamy-yellow, stores well, high-yielding, flavorful.
‘Red Wethersfield’: red-skinned, flat bulbs, white flesh, stores well.
‘Walla Walla,’ ‘Aisa Craig’: big bulbs.
‘Norstar,’ ‘Buffalo’: produce these early but keep them until late December.
‘Yellow Globe,’ ‘Copra,’ ‘Sweet Sandwich,’ ‘Southport Red Globe’: store well
‘Red Florence’: rectangle shape
Short-day varieties:
‘Stuttgarter’: yellow, sold in sets, slightly flat shape, early maturity.
‘White Bermuda’: white, thick, flat bulbs; extremely mild.
‘Red Burgundy’: white, soft, sweet inside; short-term storage.
‘Texas 1015-Y Supersweet’: suitable for storage.
‘Crystal Wax White Bermuda’: great for pickling when picked at “pearl” size
‘Southern Belle’: red colored.
‘Hybrid Yellow Granex’: sweet.
Intermediate or Day-neutral varieties:
‘Candy’: golden, stores well, jumbo bulbs, thick flesh.
‘Red Stockton’: white-flesh bulbs red-ringed, large
‘Super Star’: white, sweet, large bulbs
Harvesting:
You can pick any onions that have formed flower stalks. This indicates that the bulbs have discontinued growing and have become fully developed. These onions, however, do not store well, but you can use them in food within a couple of days.
Onions planted in the spring tend to be ready for picking by mid-summer.
When the onion bulbs start to ripen, the tops, also known as the foliage, become yellow in color and begin to topple over. At this point, you should bend down the tops, or you can even stomp on the foliage to hasten the final maturing process.
You should loosen the ground around the onion bulbs to accelerate the drying process. You can harvest the crop by late summer in the dry weather. Onions harvested in wet conditions do not preserve well and can rot in storage.
When tops have turned brown in color, you can harvest the onions. Remember to carry them carefully, as the slightest bruise during the harvest and storage can encourage rot.
Be sure to clip the roots, and cut the tops back to a couple of inches. You can leave the tops on if you have planned to braid the onions together.
Storing Onions:
Set the onions on dry ground on a tarp for some days to preserve them, if the weather allows, or you can set them in a protected place like a barn or garage.
Once dried, you can hang onions in a nylon stocking or a mesh bag. Or you can spread them to two layers deep in a dry box; weave and hang them in a well-ventilated, dry, cool area. The ideal temperature for onion storage is 4 to 15°C or 40 to 60°F. Avoid storing in a fridge, as temperature conditions will be too moist.
Periodically check for rotting or sprouting onions and eradicate them.
Don’t store the onions with pears, apples, or potatoes, as the ethylene gas generated by the fruits will disturb the onions’ dormancy. Onions might also spoil the taste of these fruits and potatoes.
You can store a robust and spicy onion longer than a sweet one. Sweet onions have high water content and therefore do not store well. You should consume the sweet varieties first and reserve the more pungent onions for later use.
Can You Plant an Onion with sprouts?
Yes! You can definitely plant a sprouted onion; however, you won’t get more onions from it. But you will get many tasty green sprouts! And here’s how to do it:
- Fill a container with potting soil and fashion a hole in the center that has the width and depth of the onion.
- Space the onion inside the hole and cover it with soil.
- Water the pot and put it in a sunny area.
- Pick the green shoots you need for cooking.
- If you get a shoot with a flower, wait for the flower to go to seed. You can save the seeds for planting during spring.
Pests/Diseases:
It’s important to know what obstacles you might face when planting, growing, and harvesting onions. Here are some common pests you might encounter when planting your onions.
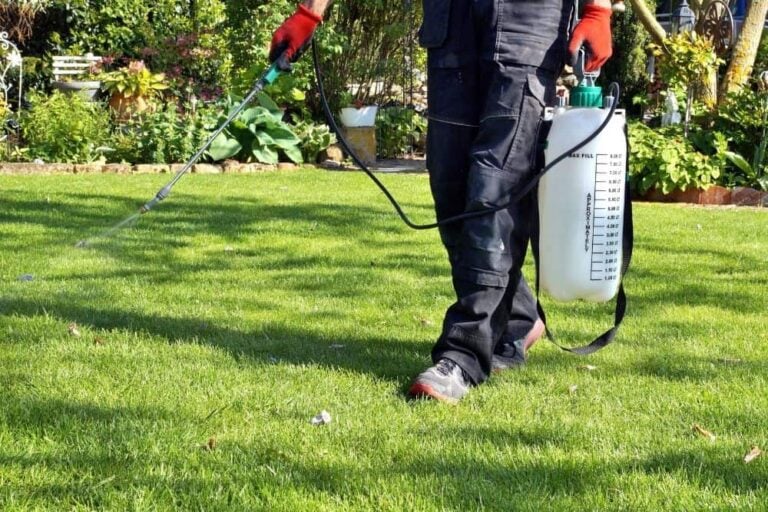
Thrips: thrips are tiny insects about as slim as a sewing needle that feed on onions. A couple of remedies with insecticidal soap kill them. You should follow the directions given on the package of such soaps. Spray the soap on the plants twice, three days in between, and the thrips should vanish. To prevent future plagues, contemplate using row shelters.
Onion Maggots: Shelter your emerging onion crop with row covers or fine mesh netting. You can close it by layering soil around the edges of the covers. Onion maggots like to lay their eggs at the bottom of the onion plants so that the mesh can prevent that.
Keep the mulch away from the plants because the pests, like the rotting organic matter, and be sure you entirely harvest your bulbs as the season advances. Onion maggots are typically a problem in stormy periods, so these safeguards might be unnecessary during the dry season.
White Rot: This is a severe disease that starts with an infected plant substance. Avoid relocates grown in soil-based manure. In this case, you should start from onion bulbs, seeds, and sets bought from inspected manufacturers or farmers. The foliage of plants suffering from white rot will yellow and wilt. Under the ground, fluffy, white fungal growth will appear on the bottom of the onion bulb.
Unfortunately, once white rot sets in, there is no known solution. You will have to excavate the entire crop and get rid of it in the trash. The soil will remain infected for many years, so avoid growing plants in the exact location.