New Ways of Growing Garlic Indoors
Garlic is one of the easiest vegetables to grow indoors. Garlic grows most successfully in a container at least one foot tall and six inches wide with drainage holes on the bottom. Use a potting mix with added nitrogen and organic manure. Push each cracked clove with pointed end up into the soil about a thumbs-length down and re-cover with soil.
Keep your soil moist and place your container in a sunny spot in your home. To harvest your garlic, use your hands to gently lift bulbs from the soil. They will then be ready for storage.
Choose Your Container
Growing garlic indoors can be successful in a few different growing vessels. Garlic isn’t a difficult thing to grow, and thrives in a few conditions with some care. The most common ways to grow garlic indoors are growing in cups and growing in garden pots.

Planting in Cups
Planting garlic in cups is usually more successful for those who are more interested in growing garlic scapes rather than garlic bulbs.
However, if you’re very careful about timing, you can begin growing your garlic in cups with a small amount of water and transfer the growing garlic to garden pots before they begin to rot (check out the video below).
Planting in Pots
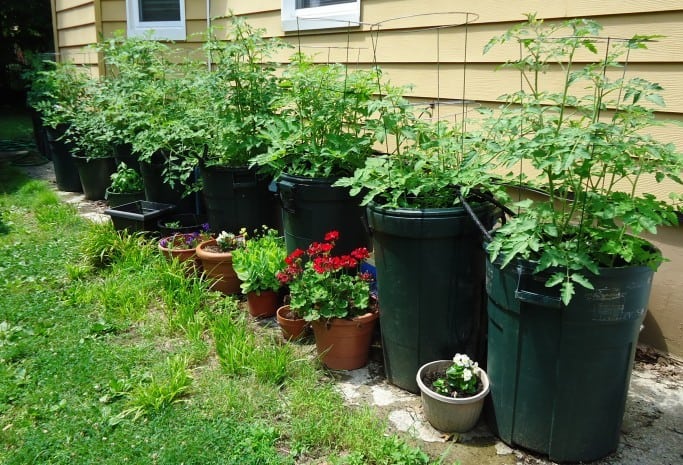
Since your garlic bulbs will not be able to continuously survive in a cup with water, you’ll need a container with soil to allow them to grow properly. For optimal growth, you’ll need a container with a depth of at least one foot and six inches in diameter. Ensure that your growing container has a way for water to drain, even if you must make some holes in the bottom yourself.
The type of container isn’t very important for garlic. You can use a garden pot, a large pail, or other sturdy container that won’t corrode from soil and allows proper water drainage.
Prepare Your Garlic
Preparing garlic for indoor planting is the same as outdoor planting.
First, be sure to choose a variety from a trusted garlic farmer or farmer’s market, either in-person or online. The garlic in grocery stores are usually treated with chemicals to allow a longer shelf-life and, therefore, may not grow successfully when re-planted.
Then, pick the garlic with the biggest cloves. Bigger cloves generally yield bigger, stronger bulbs than smaller cloves.
One or two days before planting, you’ll need to crack your garlic. This is the process of separating the cloves from the garlic bulb stem. Gently press down on your garlic bulb and pull the cloves apart. Be careful to keep as much of the wrappers on each clove as possible, as these protect the cloves as they reproduce within the soil.
Check over each garlic clove for signs of rot or disease, which can be seen in brown or soft spots or mold. The small brown piece at the bottom of each clove, known as the basal plate, should also be intact, as this will help produce the root system of your new garlic bulbs.
Plant Your Garlic
Before planting your garlic, prepare the container and soil. Your soil should have a pH of 6.5 to 7.0, so use a pH tester if possible. Use a high-quality potting soil for best results and make sure it’s a loose and well-draining soil. Sandy loam and clay soils are best. Add a small amount of organic manure to soil before you plant your cloves to aid in nitrogen content for optimal growth.
Pour your soil mix into the bottom of your container until it reaches about two inches from the top. To plant each clove, keep the pointed end facing up. This is where the scapes emerge through the soil. Place three to four cloves spaced out in your container. Over-crowding the bulbs will lead to minimal growth as your growing bulbs compete for water and nutrients.
Push each clove gently into the soil, about a thumbs-length down. Once they’re all pushed into the soil, carefully cover up the cloves with the soil, ensuring that all holes are filled back in. Leave the soil loose, though, rather than pack it down.
Caring for Your Indoor Garlic Plants
Garlic needs a consistent water supply. Indoors, you shouldn’t need to water very often. Your soil should stay moist, but not wet, as this will cause the bulbs to eventually rot. Check the soil every couple of days. If it’s dry a ½ inch to an inch down, you’ll need to give them some water.
Garlic plants also need some sun. Find the sunniest spot in your home for your garlic plant containers. If your house doesn’t get enough natural sunlight, you can use a steady grow light to help your garlic plants mature.
If desired, you can use an organic fertilizer once or twice throughout the growing season, but this isn’t necessary. Add some extra soil if you begin to see bulbs peeking through the soil, but remember to leave it loosely piled on top.
If you want to eat or cook the shoots, which are much like scallions but provide a hint of garlic flavor, you can begin to trim them once they have a few inches of growth. Leave at least an inch of the shoot so your cloves can continue to reproduce.
Harvesting Your Indoor Garlic
After growing garlic indoors, you’ll likely be excited to harvest the fruits of your labor. Your indoor garlic will usually take about 6 months to grow, but you should then have a mature bulb for every clove you planted, if you cared for them well.
To harvest, use your fingers to carefully move the soil around each sprout until you expose some of the bulb. Gently pull up on each bulb to remove from the soil. Use your hands to brush off loose soil, being careful not to knock off the wrappings or bump the garlic, which can bruise it easily. Keep your garlic dry to prepare it for storage.
Photo by Amanda Clare licensed under CC BY 2.0.