The Ultimate Guide On How To Grow Celery
Celery is one of those Mediterranean vegetables that is both healthy and easy to grow. With an intense crisp flavor that can be easily recognized, celery can be consumed either raw or used for the preparation of juices, soups, stews and much more.
Coming in different varieties and even in different colors, celery is one of the most cultivated vegetables around the world. And since this plant can be grown successfully both indoors and in the garden, more and more people are thinking of growing their own organic celery.
So, either you’re an aspirant gardener in search for valuable advice or someone who simply wants to grow celery in a pot, this guide will teach you how to grow celery step by step.
Celery Varieties

I know, I know, you’re curious how to grow celery and want to get to that step as quickly as possible. But unless you already did your homework and chose the variety of celery you want to grow (in which case you can just scroll down), I believe I should say a few words about the different varieties of this miraculous plant.
Celery can be grown either for its leaves, for its stalk or for its root, and depending on your purpose you will have to choose the right variety.
From all those three categories mentioned above, only the leaf celery, also called soup celery as its leaves are mainly used for cooking and the preparation of soups is known as an ancient variety. Nevertheless, the high number of heirlooms all types of celery have made us believe that all three types were actually cultivated since ancient times.
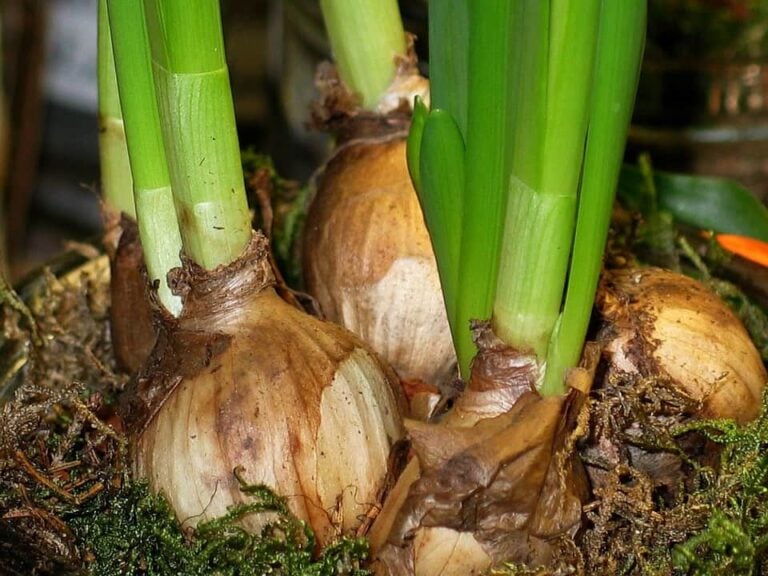
1. Root celery
Also referred to as celeriac, this type of celery is grown for its delicious root that can be consumed raw or cooked.
Root celery is really easy to grow, although it is more suitable to grow in the garden than in a pot. Depending on the variety, the root can grow to large dimensions, with each celery root weighing about 3 or 4 pounds, or you could opt for a smaller variety if your consumption requirements are reduced.
Something to pay attention to when growing celeriac is precisely the root. You will observe that the root develops partially above the ground and it is advisable to cover the exterior part with soil until harvest. Otherwise, the root can become tough and woody in texture.
Celery can be harvested at any time after you notice the root bump above the ground, but if you want to let it fully ripe, the maturation time is about 100 to 120 days. Don’t let the celery mature for too long, though, as it will harden with time.
If you want to grow small to medium size celeriac, a variety I recommend is Apple-Shaped Celery. This variety has a purple stem and small leaves with the root almost perfectly round, with a smooth surface that grows to the size of a large apple.
Another variety I particularly like is a mini celeriac variety named Tom Thumb Erfurt Turnip Rooted Celery. This root celery plant grows to dwarf dimensions and develops lovely small roots of the size of a walnut. This celeriac is very tender and ideal to be consumed raw.
Other root celery varieties you could consider are:
- Giant Prague – as the name says, a very large variety of celeriac
- Brilliant
- Early Erfurt
2. Stalk celery
As the name suggests, stalk celery is grown for its stalks. There are many stalk celery varieties, divided into self-blanching, green and red celery.
Among the self-blanching, also referred to as yellow, varieties of celery, the easiest to grow and also the most resistant is the Golden Yellow celery heirloom.
The Golden Yellow is characterized by lemon yellow stalks that grow up to 2 feet tall and by yellow leaves that make this celery appreciated for decorative purposes too. The stalks, already pale in color, can be blanched even further by building up soil piles around the stalks to keep them away from the sun. This variety is also very resistant to pests and diseases.
Another variety of self-blanching celery, probably more suitable to be grown in small gardens or indoors, is the Golden Self-Blanching celery. This variety is smaller in size and typically robust and dense. It grows well in damp soil and its green stalks will turn their color to a pale yellowish-white at maturity without any intervention.
Mostly preferred in America, however, is the green celery named Pascal Giant. As the name suggests, this is a large variety of celery that grows to about 2 feet in height. The stalk is almost white and the plant has green leaves.
Popular because of its dimensions and because of its particular butternut flavor, Pascal Giant doesn’t store well as the stalks will lose most of the water quickly. For this reason, it is recommended to grow it as an early autumn crop destined for immediate consumption.
Lastly, there is the red celery variety, characterized not only by its unusual color but also by its intense walnut flavor. Red celery thrives in cool and moist weather and it grows dark burgundy stalks and dark green leaves.
The stalks should be protected from the sunlight with piles of soil built up around them, or they might develop a bitter taste.
When cooked, the red celery stalks maintain their color and look beautiful in fresh salads.
3. Leaf Celery
Leaf celery is usually used for soups, hence the common name soup celery. It can be raised pretty much as a pot herb and develops leaves that are similar to parsley leaves. The taste, however, is intense and nutty.
Leaf celery is a type of wild celery brought under control, although in Europe wild celery can still be harvested in salt marshes in the coastal areas.
You can grow leaf celery almost all year. The plant usually reaches about 2 feet in height and thrives in cooler environments. Typically, about six leaf celery plants are enough for a household and you can increase the yield by pruning the plant regularly.
Some common varieties of leaf celery are:
- Safir – has a crisp flavor
- Par Cel – an ancient heirloom variety
The above information should help you decide what type of celery you want to grow. My advice is to choose a variety from each category, in this way, you will be able to make fresh salads with celeriac, fresh juices or stews and roasts with stalk celery or season your soups with celery leaves.
Since the only way to control the use of pesticides and chemicals is growing your own vegetables, let’s see how to grow celery in the garden.
How To Grow Celery In The Garden
Celery has a long growing season and doesn’t do well in extremely cold or extremely heat environments. Growing your own celery will be a challenge that will test your gardening skills, but the satisfaction of harvesting your celery varieties will pay off.
Just as with many other vegetables, you can choose to start with seedlings or from seeds.
Starting Celery Plants From Seeds

If you decide to start your celery plants from seeds, it is advisable to make them germinate and grow the seedlings indoors, planting the seeds about 8 or 10 weeks before the last announced frost in your area.
To start celery from seeds you will need:
- Celery seeds of the desired variety
- Seeding trays or small pots
- Potting soil
Here is how to do it:
Before planting your seeds, make sure all the trays or pots have drainage holes, then fill 2/3 of the pot with potting soil.
Sow several seeds in each pot or tray to ensure that at least one of them will germinate. If you want to accelerate the germination process, pre-soak the seeds in cold water for about 12 hours.
After sowing the seeds, cover them with about 1 inch of potting soil and water immediately. The soil should be damp but not soaked.
Place the trays or pots in a warm and well-lit room and leave them there until the celery plants germinate. Until germination, the temperature should be constant and between 70 and 75°F.
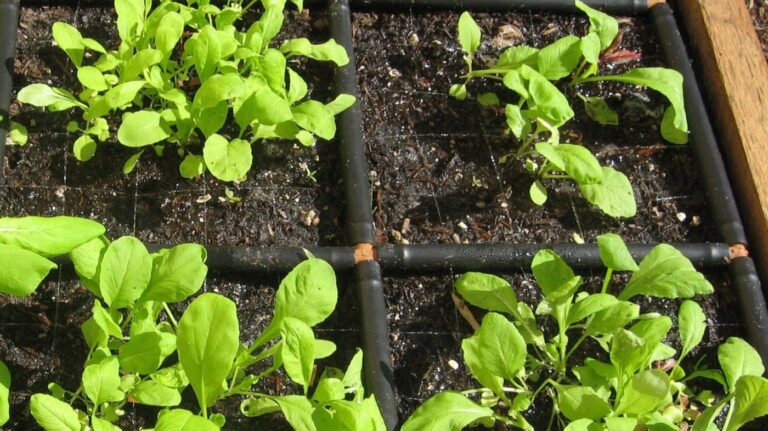
Your celery should germinate in about 14 days. As soon as you notice the seedlings, move the trays to a cooler location with temperatures between 60 and 70°F.
If more than one seed germinated in a pot, carefully remove the excess seedlings to remain with one celery seedling in each pot.
Also, pay attention to providing sufficient light. If you don’t have enough natural light indoors, use a halogen lamp or a growing lamp.
About two weeks after the last spring frost you can transplant the celery into the garden. The seedlings should be about 4-5 inches tall by now.
Transplanting Celery
Celery should be transplanted in the garden when the outside temperature is constantly above 50°F. As I already mentioned, celery doesn’t really love too cold or two hot environments, therefore you might weaken or even kill your plants if the temperature is below 50°F.
To plant your celery in the garden, choose a sunny spot, ideally one with partial shade but where your plants will still get about six hours of sun daily.
If you live in a particularly warm climate, it is advisable to protect your celery from excessive heat during the hottest hours by providing sufficient shade. For this reason, your celery should be exposed to morning and late afternoon sun.
Terrain Requirements
Celery is a heavy feeder and thrives in moist, highly-nutrient soil. In fact, since celery was originally a wild plant growing in swamp areas, celery plants can deal with high levels of moisture that other vegetables will not tolerate.
That’s good news since you will be able to grow some crops in those moist areas of your garden where nothing else seems to be growing. The only thing to keep in mind is that you should avoid having the terrain flooded, therefore medium-draining soil is a must.
Alternatively, you can plant the celery in a raised bed, above all if you are growing stalk or leaf celery.
Celery thrives in almost neutral soils with a pH between 6 and 6.5, although it could tolerate a pH of 7.0. The soil should be rich in limestone minerals, such as calcium and magnesium. The requirement is logical since the celery originally grew in the coastal Mediterranean areas.
If your soil is missing those elements, you can add calcite or dolomites limestone and work it into your soil at a depth of at least 6 inches. If you need to add limestone to the soil, remember that you should do this about three months before planting the seedlings.
You should also enrich the nutritive properties of the soil by adding organic compost or manure. Ideally, you should add half a cup of compost to each 5-foot row.
Spacing Requirements
Celery plants don’t need excessive space to grow well, but you will have to respect a few minimal requirements if you want to grow healthy plants.
The minimum spacing requirement is 12 inches between each two celery plants with a minimum of 18 inches between the rows.
Appropriate spacing will allow your plants to get enough sunlight and they will not have to compete for nutrients and water either.
In addition, it will also help you keep pests under control. Remember that both snails and slugs like celery and will eat your plants. Having celery spaced regularly will help you spot and remove the pests easier.
Temperature Requirements
As stated above, the minimum tolerated temperature is about 50°F. On the other side, celery doesn’t tolerate well temperatures above 70°F.
In fact, the ideal temperature range for growing celery should be between 55 and 70°F. For this reason, especially if you live in a warm climate, it is advisable to grow celery at the end of summer so it will have enough time to mature until mid-autumn.
In the Mediterranean regions, in fact, celery is considered a late-autumn or winter crop.
Watering Requirements
As already mentioned, celery is a heavy feeder, which means that it will need plenty of water. The lack of constant moisture can alter the flavor of the plants, making them bitter.
For this reason, just as in the case of many other vegetables, you have to make sure that the soil is constantly moist. You should give your plants at least 2 inches of water per week, adjusting the amount based on the climate conditions.
Fertilizing And Mulching Celery
To grow strong and healthy celery plants, you should also fertilize the terrain regularly. You should start using fertilizer from about the third month of growth onwards. Use a balanced fertilizer of 5-10-10 or 10-10-10 and manure tea.

Sprinkle the fertilizer around each plant, preserving a distance of about four inches between the plants and the fertilizer. One tablespoon of fertilizer per plant should suffice. Cover the fertilizer with soil and water thoroughly.
From this moment on, maintain the nutritive properties of the soil by adding a generous quantity of manure tea each week just before watering the plants.
Manure tea is an organic fertilizer that can be bought from the local nurseries or homemade.
To make manure tea at home you will need:
- Aged manure, preferably horse, cow or duck manure
- 5-gallon bucket
- Large cloth bag or a pillowcase
- Clean spray container
Here is how to do it:
- Decide the quantity of manure you want to use and fill the bucket with clean water accordingly. The ratio should be 5 parts water to 1 part manure.
- Put the manure in the cloth bag and secure it with a knot.
- Put the bag with the manure in the water and secure the edge of the bag to the edge of the bucket, maybe using a clothespin.
- Cover the bucket with a cloth to keep flies away.
- Leave the manure sit in water for about a week. By then, the water should have reached a golden brown color and the manure would have transferred its nutrients to it.
- Remove the bag and dilute the manure tea with clean water until it becomes dark yellow in color.
- Fill clean spray bottles with manure tea and use it as fertilizer to grow your celery and other vegetables.
- Alternatively, you can also use manure tea to accelerate the composting process. To do this, simply add manure tea to your compost pile.
- Don’t use cat, dog or pig manure to make manure tea.
You can also mulch your celery plants if you want to. In fact, mulch helps the soil maintain the water and avoids the growth of the weeds. There are many organic mulches you could use, the best probably being the straw mulch.
However, I find particularly useful the use of black plastic mulch when it comes to growing celery. This type of mulch offer a better control against weeds and pests and also helps the soil maintain a warm temperature, making it possible to plant the celery earlier.
Blanching Celery
If you decide to grow a type of celery that is not self-blanching, you might want to blanch your celery before harvesting.
This operation is usually done two to three weeks before harvesting and it is not essential. However, blanching will prevent your celery to have a bitter taste and it will make it sweeter.
Blanching actually means obstructing the sunlight to reach the stalks. In this way, the chlorophyll will fade away and the stalks will become whiter.
Notice that you will not have to do any blanching if you decided to grow a variety that is self-blanching.
The easiest way to blanch celery is by gently building a pile of soil around the stalks, paying attention to not damage them.
Alternatively, you can use newspaper sheets to block the light. Simply wrap the newspapers around the celery stalks and secure them with tape. Remove the newspapers in the harvesting day, then harvest your celery.
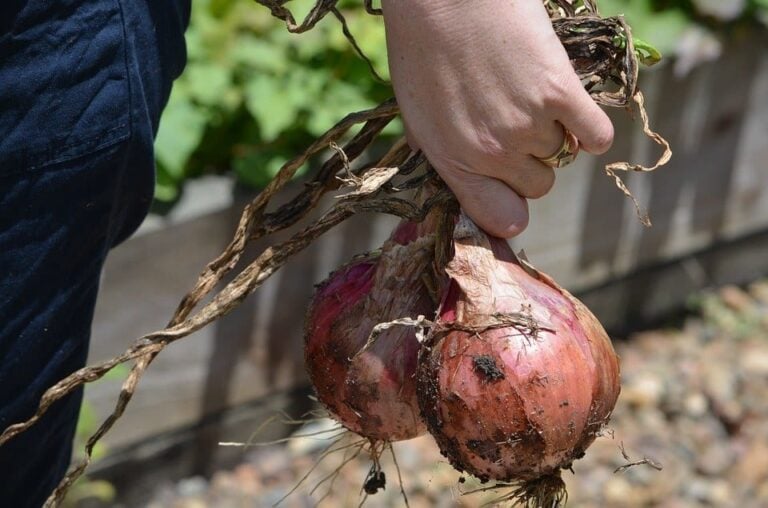
Harvesting And Storing Celery
Celery matures after about 100-120 days and it should be harvested either before the beginning of the hot season or right before the first frost.
Ideally, the lowest celery stalks should be at least 6 inches tall and the tallest ones should reach about two feet. Of course, you should also consult the seed package to see how tall your plants should be at maturity.
In the case of celeriac, you can harvest it at any time after you notice the upper part of the root bumping above the ground level. However, if you want to harvest fully ripe root celery, wait for at least 100 days before harvesting.
Remember that celeriac harvested too mature can have a woody texture, so consider this to determine when is the best time to harvest.
Leaf celery can be harvested as soon as the plant is bushy enough so you can harvest the leaves without damaging the plant.
To harvest stalk celery, simply cut the whole bunch of stalks from just above the soil. Remove the leaves, wrap the stalks in a damp cloth and store them in the refrigerator at temperatures between 32 and 40°F for up to two weeks.
Alternatively, you can freeze the celery stalks either whole or cut into pieces.
The leaves of the celery plants grown for their stalks can still be used to flavor a wide variety of dishes.
To harvest root celery, loosen the soil around each plant with a gardening fork after you have cut away the stalks. Pull out the roots either with your hands or using the fork, paying attention to not damage the celeriac.
Trim off the rootlets and remove the excess dirt, then store the celery roots in the refrigerator for up to two weeks. Celeriac doesn’t store well for long periods, therefore it is advisable to leave the roots you don’t need in the ground until consumption if there are no heavy frosts in your area.
How To Grow Celery Indoors
To grow celery indoors, you can start your crops from the seeds in the same way described above. When the seedlings are about one inch tall, it is time to transplant the celery into larger pots where they will continue their growth until harvest.
To transplant the celery, you will need:
- 8-inch diameter pots
- High-quality potting soil
- Compost
- Organic or plastic mulch
Here is how to do it:
- Mix the compost with the soil and fill the pots with the mixture.
- Plant one celery seedling in each pot and add more soil around the plant.
- Water thoroughly and cover the soil with a layer of mulch. This will help the soil maintain the moist.
- Place the pots on a sunny windowsill. Your plants should receive at least 6 hours of direct sunlight daily.
- Alternatively, invest in growing lamps and give your plants about 12 hours of light per day.
- Check the humidity level of the soil daily, making sure that it is constantly moist.
- The growing temperatures apply, so make sure that the temperature in the room where you grow the celery stays constantly above 55°F.
- If pests such as aphids or spider mites occur, spray the celery with a solution of water and liquid soap instead of using an insecticide.
An alternative way to grow celery indoors is to regrow the plant from an old stalk.
To do this, you will need:
- An old celery stalk
- A saucer
- Water
- Potting soil and compost mix
- 8-inch diameter pot
How to do it:

- Clean the old celery stalks base and place it in a saucer full of lukewarm water. The side with the cut stalks must face upright.
- Place the glass on a sunny windowsill and wait. After about one week you will notice that the stalks started to dry out but the small leaves that were in the center of the bunch started growing.
- At this point, check the pots and make sure all of them have drainage holes.
- Fill them with the soil and bury the celery stalks completely, leaving on top of the soil only the green leaves that started to grow.
- Water thoroughly and place the pot on a sunny windowsill. After a few days, you will notice that your new celery plant is starting to grow new stalks and leaves.
- After a few more weeks, as soon as the celery is bushy enough, you can start harvesting both celery leaves and stalks to use for your recipes.
- Care for the celery just as described above.
Celery Common Problems And Solutions
My celery tastes bitter and the stalks are tubular. Why?
Celery’s taste is influenced by the growing conditions, above all by the soil’s humidity, or more precisely the lack of it, by the temperature and by the level of nutrients.
A lack of proper watering, a low level of nutrients and cold temperatures can make the celery’s flavor turn bitter.
On the other hand, an improper watering can also cause the stalks to change shape and become tubular. They will still be edible but not as tasty as those of celery grown in ideal conditions.
Celery Common Diseases And Pests
Both outdoors and indoors, celery is subject to a number of pests and diseases. Let’s have a look at the most common and see how to deal with them.
Common diseases
- Mosaic Virus: usually transmitted by aphids, mosaic virus develops yellow mosaic patches on the leaves, making them crinkled and curly. The plants will die shortly after.
- How to solve: a good prevention against aphids should keep your celery safe. You should know that weeds can also increase the chances of contracting the disease, therefore it is advisable to mulch well around celery plants. Rotating the crops will also help.
- Early Blight: this disease causes small yellow spots on the leaves that will eventually transform into circular, gray lesions.
- How to solve: to start with, you should be sure that you start the crop from healthy seeds, either by buying certified ones or by soaking the seeds in hot water prior to sowing. Correct watering and fertilization should also help in the management of the early blight, as this will help the plant develop its own defense system. Respecting the spacing requirement and not watering the leaves are further methods that should help prevent early blight without the use of fungicides.If you notice the disease on a plant, it is advisable to remove it and to avoid planting celery in the same spot for about four years.
- Pink Rot: another common disease caused by a fungus, pink rot causes brown lesions on the petioles and leaves. These lesions transform quickly into soft areas of decay and the nearby tissue turn pink. Eventually, the celery base will collapse.
- How to solve: Pink Rot is caused by Sclerotia, a fungus that can survive in the soil for prolonged periods and that can be carried by many weeds and crops. To prevent the disease, you should respect the spacing and watering requirements and avoid watering the leaves. Crop rotation might also, although not necessarily, help. Soil inversion or deep plowing are pretty much useless in the management of the disease.
- Bacterial Leaf Spot: causes brown spots that are soaked in water on the leaves, which will eventually turn yellow. The disease thrives in lower temperatures.
- How to solve: rotating the crops and removing the infected plants are two efficient ways to prevent bacterial leaf spot. You should also avoid watering the leaves, especially in the late stages of development of the crops. Using a soaker hose for irrigation is strongly advised.
Common Pests
- Celery Leaftier: pale green or yellow caterpillars with a dark green stripe on their back, actually larvae of a moth. They eat the leaves and the stalks but that’s not the only damage. In fact, celery leaftier also build webs on the leaves, tying them together.
- How to solve: picking the caterpillars by hand is one solution, for this reason, you will need to respect the minimum spacing requirements. You can also remove them from your celery plants by applying pyrethrum two times at a distance of about one hour.
- Aphids: red, peach, light green or black insects that feed with the plant’s liquids, spreading diseases such as Mosaic virus and leaving a sticky residue on the foliage that will eventually attract ants.
- How to solve: aphids have numerous natural predators you can introduce to your garden. In fact, ladybugs feed on aphids, therefore introducing them to your garden could be a great solution to keep the pest under control. Alternatively, use a mixture of water and soap and spray it on the plants. This will not only keep aphids away but it will also prevent the formation of spider mites.
- Cabbage Looper: green worms with striped sides that feed on celery leaves and petioles.
- How to solve: it is recommended to handpick these larvae. On the other hand, covering your crops with thin fabric covers might prevent insects deposit their eggs on your celery plants.
- Snails and slugs: they feed on the celery leaves and talks.
- How to solve: handpicking might be useful, but to keep them away from your plants you have to keep them away from your garden. To do this, hiring some natural predators might help. Some birds and beetles feed on slugs and snails, so it would be a good idea to attract them to your property. Planting a few natural repellents could also help keeping slugs and snails away from your garden.
- Beet Armyworm: larvae of a brown moth, they feed on leaves and petioles.
- How to solve: covering the crops to prevent moths from depositing larvae might help. Natural predators, such as parasitic wasps, might also help to keep these worms under control. Lastly, you can handpick them and ensure that your plants are clean.
Final Thoughts
Now, you know how to grow celery both indoors and in the garden. Don’t forget that celery is extremely sensitive to temperature and watering, therefore make sure that the weather is warm enough and that you water frequently enough if you want your plants to grow healthy and strong.
Have you ever grew celery before or is this your first attempt? What type of celery are you planning to grow? Either you have questions or tips and tricks, please leave a comment below and share your thoughts.
And if you want a suggestion, go for red celery if you are growing it for the stalks or for Tom Thumb Erfurt Turnip Rooted Celery if you want to harvest tiny, bite-size celery roots to add to your salads or soups.