How To Kill A Tree Stump – Plus Best Stump Killers Reviewed
It’s so satisfying seeing a tree that’s been bugging you fall. However, this happiness can quickly be replaced by frustration as you realize that you’re stuck with a well-established tree stump.
Trying to remove this stump and root network can be an exhausting job, leaving you to sadly give up on landscaping the area altogether.
No one wants their gardening plans ruined by a stubborn tree stump! There are several great solutions, either by employing a tree surgeon or using the DIY method.
In addition, there are 6 simple ways for you to remove this deeply rooted problem. Read on to learn them!
We’ve also included a handy review of the best off-the-shelf stump killers to help you even more.
How to Kill a Tree Stump Fast
If you desperately want to remove the tree stump quickly, there are various methods you can use. However, it’s important to note that each option has its downsides.
Therefore, we’ve provided a little guide below to show you each approach’s pros and cons.
If you’re a tree-stump-slaying newbie, this section will help you understand the basic methods that may work for you. However, if you want to know the best products, it’s best to skip this bit and head straight to the review section.
We’ve ranked the following tree stump removal techniques in order of speed to aid you in your decision-making process.
1. Hiring a Stump Grinder – 1+ Day
A professional stump grinder is a potent tool that quickly removes that pesky stump. The advantage to these is that these grinders don’t cause much damage to the soil structure surrounding the stump.
But, these tools do require some physical strength and stamina, so it’s not for frail elderly gardeners. The grinder can often cost a lot to hire, too.
These tools are noisy, heavy and need you to be competent enough to safely work them. It’s important to note that they can be dangerous when not used correctly, so you must handle them with care.
2. Digging the Tree’s Roots Out – 2+ Days
If you have a small tree stump, it’s often easiest to simply dig them out. The advantage of this option is that it requires no special tools other than a spade. In addition, this method works on muscle power, determination, and perseverance.
However, the soil type and condition play a crucial role in how easy this method is. If the soil is dry, or stony, digging can be super hard work.
You can control how long it takes, of course, but you may find that the deeper you dig, the more unexpected tree roots you discover.
Typically, the more the tree roots, the harder a stump is to remove. This is why it’s the standard gardening practice to simply leave the roots in the ground and focus on killing the stump.
3. Burning he Stump Out – 4+ Days
Burning is a brilliant option to get rid of a stump. The whole process takes approximately 24-48 hours. However, this time can vary depending on how large the stump is.
This method involves drilling or cutting burning slots, then drenching the stump in oil or fuel to help it burn. As with fire, caution should be exercised because it is unpredictable and potentially dangerous.
4. Using a Stump Killer Product – 2-6 Months
Stump-killing products are generally made from chemical compounds that allow you to quickly rid yourself of stumps. The disadvantage to this method is that patience is required because the chemical works slowly.
The product is a super-safe option needing much less tiring work than using a grinder, burning the stump, or digging.
There are many products on the market, such as the organic Epsom salts, RoundUp, or more practical ways that include hammering in copper nails.
5. Using Epsom Salts – 1-6 Months
This excellent mineral compound is organic, so this is a perfect option if you’re super concerned about putting chemicals on your soil. The downside to this more natural removal method is that it’s slower than using chemical compounds.
It’s not likely to be as effective as artificially made products, but it’s a pretty clean and straightforward option.
So, if you don’t have the time or energy for more laborious options and want to keep the process natural, this is the one for you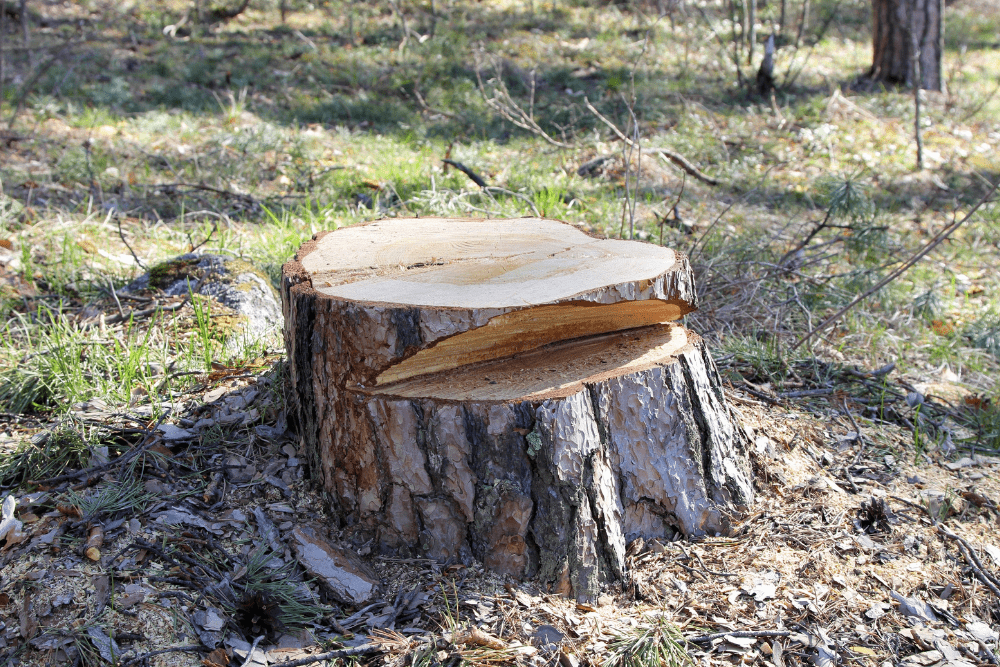
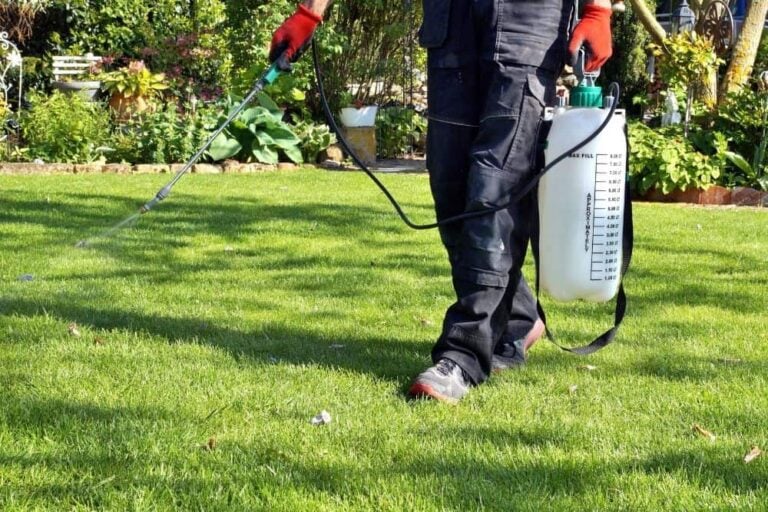
Using a Chemical Tree Stump Killer
Even though it’s typically the slowest way to kill a stump, chemical compounds are the safest. As it’s the least laborious method, it’s the most popular, too!
Step-by-Step Guide to Applying Stump Removal Chemical
Step 1: Put on protective goggles and gloves. Using a quality saw or chainsaw, cut low to the ground as much stump off as possible. Take off any tree bark because it’s partially waterproof and can prevent decomposition.
Step 2: With the remainder of the stump, drill holes vertically, approximately ½ to 1 inch wide. Put the holes about 1-2 inches apart, tunneling as low as you can or to around 6 inches. It’s best to make the spots go deeply into the wood, beneath the surrounding soil’s surface.
Step 3: Make sure you’re still wearing your protective gear, pour your preferred chemical stump killer into the holes, and fill them. Ensure you’re following the product’s instructions before you open it.
Step 4: However, if you choose a granular option, the instructions will likely say that you need to put water into the drill holes before adding the chemicals. This will allow the compound to dissolve and soak into the stump’s wood fibers to get the desired outcome.
Step 5: Regularly observe the rotting process, adding more chemical compound products if you need to. Typically, stumps become spongy after a few weeks using this treatment. Use a pickax or spade to dig out the wood remnants when this happens.
Accelerating Stump Rot
The tree stump rotting process depends on a few different factors that affect the time it takes. Sadly, some of these aren’t in your control. For instance, a softwood tree stump takes less time than a hardwood one.
However, if you want to accelerate the process, you can take a few extra steps.
The soil type and aeration level will affect the rotting rate because decaying requires oxygen. If the soil around the roots is well-aerated, you’ll observe a quicker root and stump decomposition.
In addition, moisture and air temperature influence how efficient the chemical compound will be at decaying the wood. The stump decomposes in the same way that when other wood types are damp for extended periods, they tend to soften and rot.
The most important way to accelerate stump rot is by preparing the wood properly. It’s been scientifically proven that moist wood with large surface areas and excellent aeration provides the best environment for decay. But, how do you cause these conditions?
- To reveal the largest surface area possible, reduce the stump so that it’s as low to the surrounding soil as you can. Get rid of the bark using a shovel, ax, or saw to cut off any shallow roots.
Hack, slice, or saw the stump’s surface, making deep grooves. This creates a larger surface area, encouraging rotting.
- Once per week, water the soil surrounding the stump and wood itself.
- If you can, separate the soil around the roots, loosening the compact ground. This will add precious oxygen to the sources.
What Is The Best Tree Stump Killer?
Now that you know the basics about using chemical compound stump killers, you probably want to know the best products. But with the market saturated with items claiming to decompose your stump the best, which ones actually come out on top?
It can be so overwhelming to try and figure out the best one. Spending ages reading descriptions could leave you throwing in the towel on the search.
This would mean resorting to exhausting yourself hacking away at a stubborn stump, and no one wants that!
We’ve sorted through the products and have hand-selected the items to make this process easier for you. These are high-quality options to suit those with different budgets.
And, to help you make your decision even quicker, we’ve made a pros and cons list for each.
So, below we have the top products for you to choose from.
1. Bonide (BND272) – Ready to Use Stump-Out (1 lb.)
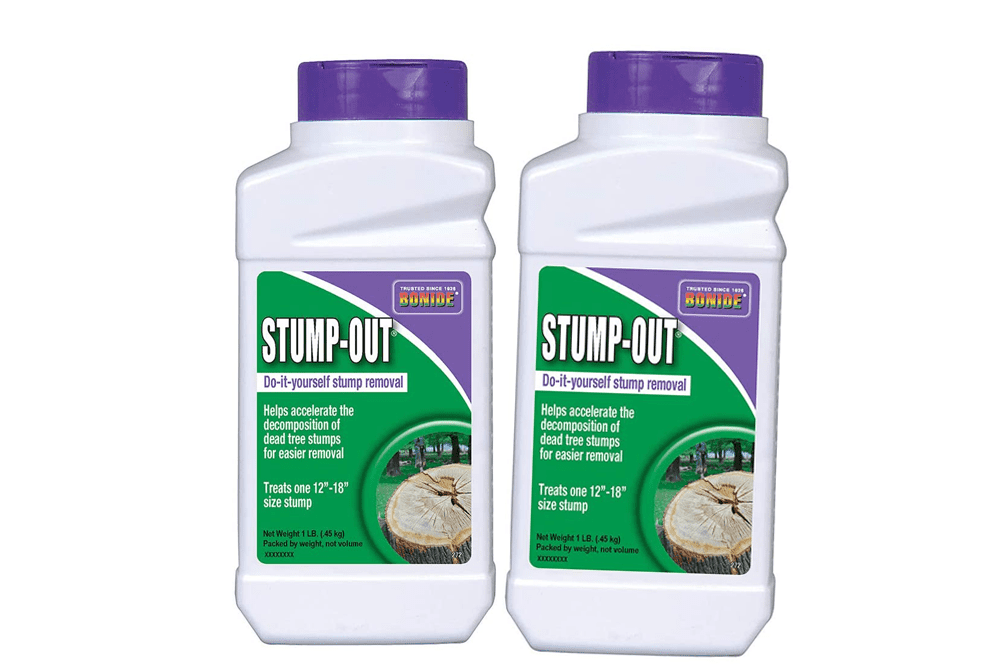
Stumps don’t stand a chance with the Bonide Ready to Use Stump-Out! These granules are made from sodium metabisulfite rather than potassium nitrate, making them super effective at causing the stump to rot.
This easy-to-use product stops you from bothering to dig or chop your pesky stumps. Instead, by drilling holes in the remaining wood and filling them up with this chemical compound and water, you’ll accelerate the decaying process.
If you’ve been having trouble with stumps that keep sprouting growth, this product is perfect for you. Letting the product soak into the wood is key to using it, as is patience! The chemicals take 4-6 weeks to fully work, but you can quickly get a stump gone for good once they do!
How to use:
Put on goggles and protective gloves. Then, drill holes into the stump as deeply as you can. Pour a considerable amount of the product into each without filling them completely. Follow this by adding water so that each hole is completely filled. After 4-6 weeks, you can easily remove the stump by digging it out or burning it. Be sure to stay safe!
Pros:
- Granules – Meaning you don’t have to spend time mixing together the right amount of product. You can pour this straight into the holes.
- Low-effort – You can leave the chemical compound to work for 4-6 weeks without applying more granules.
- Safe – The granule formula reduces the risks of digging or hacking a tree stump out.
- Sodium Metabisulfite – Encouraging the natural decaying process by soaking the wood.
- Requires few gardening tools – To apply a formula, you only need a drill and something to put water into. Super simple for DIY newbies!
Cons:
- Not instant results – You would have to wait 4-6 weeks before finally removing the tree by burning it or digging it out.
2. Spectracide HG-66420 Stump Remover
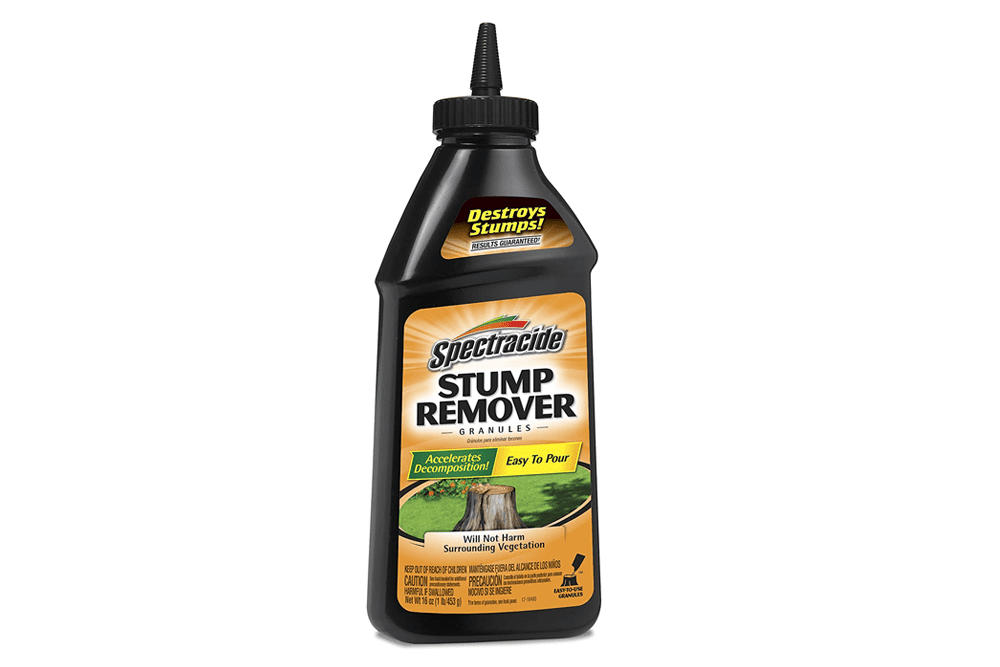
For those looking for a value-for-money potassium nitrate product that works, the Spectracide HG-66420 Stump Remover is ideal. The chemicals come in granules that react with hot water to create an effective decomposition reaction in wood.
Knowledgeable customers report that you must dissolve the granules down the vertical holes with hot water for the product to work well. This hot water must be poured carefully and slowly into pre-drilled holes for the chemicals to work as it says.
Some customers even say that they saw results in one day! However, for the wood to decompose enough for you to smoke it to ashes using charcoal, you must wait about 6 weeks. After this time, parts of the stump will come apart quickly using a pickaxe.
The chemicals will accelerate decomposition if you read all the directions carefully. So again, please make sure you wear protective gloves and goggles when handling these products!
How to apply:
Wearing safety goggles and gloves, drill vertical holes into the stubborn stump. Then add the number of granules directed on the packaging’s instructions. Next, boil water from your kettle, take it out to the area and fill the holes with hot water.
Leave the product to sit for approximately six weeks to give it an excellent chance to aerate the wood and help it rot. The stump should become porous, allowing you to then quickly burn or remove it using a pickaxe.
Pros:
- Potassium nitrate – Making your solid stump porous, allowing oxygen to help it decompose.
- Low maintenance – Allowing you to leave the stump unattended for approximately 6 weeks while it decays.
- Value for money – Letting those on a budget remove their stubborn stumps without experiencing exhaustion or having to overspend.
- Easy to use – Meaning you can easily add the granules into vertical holes with hot water. No extra mixing or knowledge of fancy chemicals is required!
Cons:
- Not instant – Meaning you have to exercise patience and wait for approximately 6 weeks for effective results.
3. VPG Fertilome 32295 32 oz Brush Stump Killer
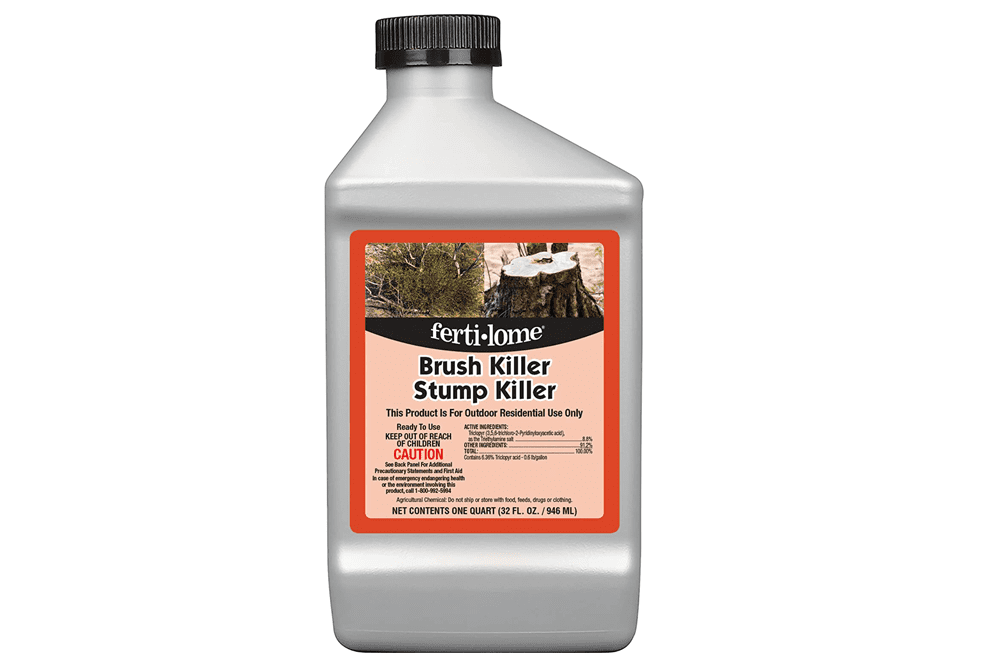
The VPG Fertilome 32295 32 oz Brush Stump Killer is a brilliantly diverse product that can be used for more than tree stumps. It can be used on out-of-control blackberry plants, strawberry crawlers, and unwanted vines.
This means it’s excellent value for money and saves you having to hack at prickly plants.
Made up with 8.8% triclopyr, which makes it super effective at killing unwanted tree stumps. The key is to closely follow directions.
Then, you can easily cover your stump in the product without needing to exhaust yourself by digging!
How to apply:
Dip a pretty large paintbrush into the product for tree stumps and apply it all over the freshly cut section. Build up the solution so that there’s a nice thick layer atop the stump, allowing the chemicals to seep into the grain over time.
If you would like to see where you’ve been, customers recommend adding a drop of food coloring to the product.
For vines and small tree stumps, add it to a spray bottle if you cannot brush the product on easily. It helps at this stage to add some food coloring into the bottle, shaking it so that the stump killer mixes with it.
This method lets you see where you have sprayed it, preventing you from using too much and wasting money.
You can even apply this plant killer to stubborn large plants. If you’re struggling to remove cacti because it keeps growing back, spraying this product onto it will help.
The solution will likely kill the cacti, stopping you from having to dig out the entire root system.
Pros:
- Multi-purpose – Allowing you to save money on buying different plant-killing products. It can also be successfully used on cacti, blackberry plants, unwanted weeds, and strawberry climbers.
- 8.8% triclopyr – Meaning you would be treating the unwanted stumps and plants with an effective product, killing them off.
- Easy application – There is no need to drill holes; you won’t have to rush out and buy a drill! You simply need a paintbrush to spread it over freshly cut wood.
- Value for money – Letting those on a budget neaten up their garden.
Cons:
- Not instant – You would have to be patient before quickly removing the root because the solution takes a while to work.
4. BrushTox Brush Killer with Triclopyr, 32 oz

This is a brilliant option if you’re looking to kill off and remove any persistent woody plant.
The BrushTox Brush Killer with Triclopyr is very toxic, so you must be careful when handling it. However, this toxicity makes it highly effective at tackling even the heftiest stumps!
This is 32oz, meaning it will treat up to 1 acre of ground. So you can use it on much more than tree stumps, including unruly brambles, weeds, poison oak, and ash poison ivy.
This is a popular product for gardeners who want a no-messing stump killer that is super powerful.
It has a high concentration of triclopyr, which means that your stubborn plant doesn’t stand a chance against it. The chemicals control and stop sprouts from forming on freshly cut stumps.
This value for money product allows you to deal with broadleaf weeds and an impressive number of plants. So, you can deal with every difficult growing thing in your garden with this product, if you want to!
How to apply:
Make sure you’re wearing heavy-duty rubber gloves. Please be aware that if you get the liquid on your clothes, it’s highly likely that you will have to throw them away. The solution doesn’t come out, and it’s very smelly!
If you want to quickly treat a stump and/or a large selection of unwanted plants, add the solution to a spray bottle or automatic sprayer. Then, apply a generous amount to the freshly cut tree stump or plant.
The time for the chemicals to take effect will vary depending on the plant or stump’s thickness. A thick stump will take approximately over 2 weeks to noticeably change.
For weeds, it will take roughly less than 2 weeks to be effective, but it truly depends on the plant’s level of maturity.
Pros:
- 32 oz – Allowing you to kill up to 1 acre of ground and tackle a thick tree stump seriously.
- Highly concentrated with triclopyr means it’s super toxic, so it will powerfully kill most plants and stumps it comes into contact with. You must wear thick rubber gloves when using them to be safe!
- Value for money – Letting you use it on much more than tree stumps! It can be used on weeds, unwanted grass, and forging a pathway.
- The solution stops resprouting – So, if you decide to leave your stump after treating it with the answer, it won’t resprout. Giving you the option not to dig up the stump after applying the chemicals.
Cons:
- Spray bottle or machine not included – So, you would have to buy an electric or manual spray container. Luckily, manual spray bottles are pretty inexpensive, so they’re ideal if you’re on a budget!
5. Solimo Epsom Salt Soak, Magnesium Sulfate, 8 Pound
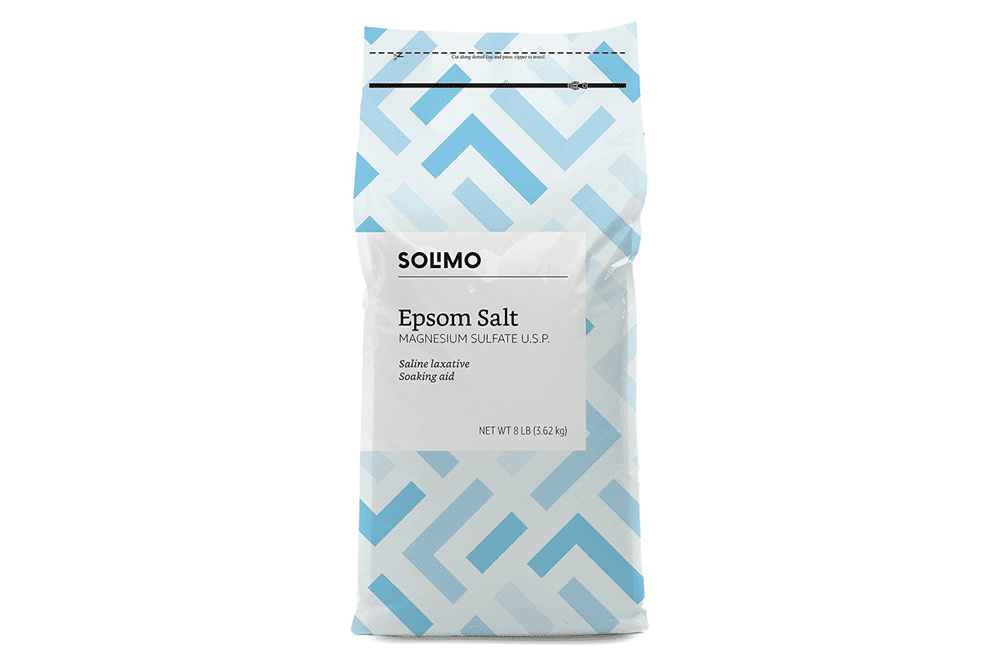
For those who want to only put natural materials into their soil, this Epsom salt soak is ideal. The customer reviews report it’s excellent at killing unwanted plants and stumps. In addition, this is a fantastic value product, so this is definitely ideal if you’re on a budget.
This DIY method speeds up the natural wood-decaying process to 6-12 months instead of 3 to 7 years. In addition, the product has sulfur and magnesium in it, which are helpful to plants in small amounts but deadly in large ones.
So, this is truly a multipurpose product, as you can add a little sprinkle to plants that need a helping hand.
Epsom salt works to rot stumps by overdosing it and dragging the moisture from them, which kills them.
How to apply:
Put on protective goggles and gloves. Drill deeply into the stump with a power drill, making holes approximately an inch wide. Next, cover the stump top with Epsom salt, then sprinkle it with water.
To stop the rain from removing this treatment, wrap the stump in a tarp or other plastic sheeting. Then, repeat this treatment every few weeks to keep accelerating the decomposition process.
Pros:
- Natural – Allowing you to avoid using harmful chemicals in your garden, protecting the ecological system.
- Multi-purpose – Letting you feed struggling plants a little to boost their magnesium and sulfur levels. You can even put some Epsom salts in your bath!
- Value for money – Meaning those on a budget can safely aid the decomposition process of tree stumps without spending a fortune.
- Can be mixed into a weed killer – Letting you add household items such as vinegar and dishwashing soap to it to remove other stubborn plants.
Cons:
- Slow to work – You will have to reapply for the treatment every few weeks for 6- 12 months. Not ideal for those with limited time to spare!
6. Dow AgroSciences RTU548 Tordon RTU Herbicide

The Dow Agrosciences RTU548 Tordon RTU Herbicide, if you’re looking for a long-lasting root killer. This easy-to-use product is powerful and so good that you won’t want to use it anywhere close to what you want to keep. It’s even strong enough to kill live trees!
When using it, you need to protect your skin to avoid getting even a drop on yourself. However, the formula has several additional benefits, too!
First, it’s brilliant for killing infections such as the stubborn honey locust one. It’s best to cut slits in as many roots as you can then pour the product directly into them to destroy this disease.
This will stop any extra saplings from popping up too!
This product is highly praised by customers. Some customers say that among treating easy to remove stumps well, it also works excellently on Greenbriar, black locust, privet, and other hard to kill stumps.
It also helps stop unwanted trees and bushes from trying to regrow.
The solution is carried down to the roots, meaning it’s so persistent that it will remain there for approximately a year.
So, with this product, you won’t have to worry about the effect wearing off before the plant has thoroughly dried. Of course, you wouldn’t have to cut off sprouting roots later either!
In addition, the manufacturers have put blue dye in there to help you see where you’ve been! So, you won’t have to waste product by accidentally going over the same stumps.
You don’t have to mix or measure it either, making it ideal for gardening beginners. It even has a unique cap to make application easy.
How to apply:
Adorn your protective goggles and gloves to avoid mishaps. Then, if you’re a beginner, use the unique cap that allows the solution to dribble out, giving you more control than otherwise.
Then spread the liquid over the entire freshly cut area of the tree stump.
Add the liquid to a spray bottle if you want an alternative method. Some customers believe this application process is more straightforward for giant stumps, although this is down to personal preference.
But, of course, there’s no need to dilute the fluid, either!
You don’t need to apply it thickly as the solution is super strong. Do not use it on cut branches if you intend the tree to live as the whole plant will die.
Pros:
- Cap – Allowing you to control how the fluid goes on. This cap lets the liquid dribble slowly, ideal for gardening beginners.
- Multi-purpose – Letting you use it to kill diseases on plants such as the stubborn honey locust. It will kill roots well, too.
- Long-lasting – Meaning the solution will stay in the roots for approximately a year. So, you won’t have to keep retreating and chop off sprouting stumps.
- Easy to apply – Allowing gardening newbies to kill off their unwanted tree stumps comfortably. This product won’t require mixing it or measuring out a formula.
- Super powerful – So you can apply it with confidence that it will kill the stump, roots, or weed that you want it to!
Cons:
- Harmful to the skin – You have to wear strong rubber protective gloves when handling this product to avoid hurting yourself.
How to Burn Out a Stump
After you’ve applied an excellent stump-killer to your unwanted wood, you might be thinking, “now what?” Well, a great way to remove a stump for good is by burning it. But, unfortunately, this wood often doesn’t burn as quickly as many people believe.
There are several different ways to burn your stump, which we’ve listed below.
Sawing and Burning
This method requires using a pole saw or chainsaw to cut a grid into the stump. To do this, cut deeply into the wood to create 2×2 inch wooden uprights still attached to the stump. This way is brilliant for making fire reach deeply, causing the stump to burn quickly and effectively.
Drilling and Burning
Similarly, the drilling and burning method makes the fire penetrate deep down into the stump. The difference is that you are also drilling horizontally and vertically with a 1-inch drill bit.
Again, you want to make the holes intersect, connecting the vertical and horizontal channels.
By interconnecting these holes, you’re creating brilliant airflow fuelling the fire and giving you options aplenty for where to start burning the wood. To start the fire, you can either do one of these effective methods:
- Take strips of cloth or rag and soak them in a flammable liquid. Great liquids for this are white spirit and BBQ lighter. Once absorbed, push the rags through the holes in the wood until they’re deep inside the tree stump.
- Douse the tree stump in a flammable liquid, letting it soak in. Pour the solution once every day for a few days to absorb it deeply by the wood.
This method is like preparing a BBQ’s coals; you have to let the wood soak in for a practical, robust, steady burn. It’s essential to cover the stump in the tarp to stop the flammable liquid from being washed away by rain during the soaking process.
Safety Warning
You must take safety precautions. Once the fire has been lit, don’t apply more flammable liquid under any circumstances! Even if the stump doesn’t appear completely alight, let it cool down for 24 hours before using the flammable liquid.
Make sure the surrounding area is safe for you to light a fire. Beware of bush fire risk. Once it’s taken hold, fire is so challenging to control. Lighting a fire in an open area after rainfall is ideal.
How to Get Rid of a Tree Stump With Charcoal
You’ll need to prepare using the previously mentioned sawing or drilling technique for this method. This will help the fire spread deeply into the stump and catch much more quickly than otherwise. You will also need a BBQ.
Bring your BBQ next to the stubborn stump and fire up some coals as though you are getting ready to cook. When the coals are glowing hot, gently and safely place them onto the stump’s top.
After you’ve done this, the coals will break up, burn and fall into the holes or grooves you’ve previously created.
Allow these hot coals to work through the stump and smolder until there’s nothing left but some ash and bits of burnt wood.
Tips for a Safe and Successful Stump Burn
- Ensure the stump is dry and seasoned. It won’t be possible to set fire to a fresh, moist tree stump. Leaving it for about 12 months should be enough time for the best chance of burning the stump.
- Using an electric saw or hand saw, cut away the excess wood. Make the top of the stump horizontal and low to the surrounding soil. It’s best if about 4-8 inches of stump poking above the ground.
- Make sure you’re drilling your holes approximately 8 inches deep and 1 inch wide into the stump. Drill from the side, top, and down into the roots to create the desired hollowed-out area that allows flames to thrive. This will help the air to penetrate the stump, oxygenating the fire.
- If you are drilling over a prolonged period, make sure you cover the stump in tarp between sessions. This will stop any rainwater or sprinkler water from dampening the wood.
- Using a chainsaw to fray the stump’s edges will create a tinder-like environment.
- If you’ve drilled holes, fill them with flammable liquid. It’s best to allow the stump to soak in this fluid. Alternatively, rags saturated with flammable liquid will serve as a wick that draws the fire deep into the wood.
- Put a bottomless metal bin around the entire protruding stump if you can. This will help stop the fire from spreading.
- Oxygen is crucial if you want the stump to burn super quickly with intense flames. Using a reversed vacuum cleaner or leaf blower will speed up the burning process a lot. Please be wary of any floating embers that will likely fly out from the fire and land nearby.
- Once the fire has taken on the stump, it should eventually turn into a super slow burn. The inner cavity holes will allow the fire to burn well from the inside to the outside. This method will take approximately 24 hours to complete.
Will Copper Nails Kill a Tree Stump?
Yes, over time. Copper negatively affects a tree’s growth metabolism, eventually killing them. However, a small and medium-sized tree stump can be destroyed easily using copper nails.
This prevents you from having to introduce harsh chemicals to your ecological system. Below, we briefly describe how you can use them.
For this method, you only need pure copper nails. It’s best to use 4-inch nails that penetrate deeply into the stump.
We recommend using around 12 nails to kill a stump around 6 inches or less in diameter. The general rule is to use 1 copper-nail per inch or so as you hammer around the stump’s circumference.
How To Use Copper Nails To Kill a Tree Stump
Step 1:
Hammer the copper nails vertically profoundly into the tree trunk. Put them in as low as possible so that they’re as close to the roots as you can get them. Hammer the nails so that there’s approximately a 1 or 1.5-inch gap between them, following the stump’s circumference.
For small trees, reduce the wood, so it’s as low down to the ground as possible, then follow the above instructions.
Step 2:
Cut off visible roots and sprouts. This cleverly tricks the stump to take its nutrients from the toxic copper nails rather than the surrounding soil.
Step 3:
It’s essential to leave the nails in the stump for as long as you can. Small trunks that are approximately 3 inches wide will decompose within a month.
Whereas, for medium-sized stumps, the nails can take up to 3 months or more to work their magic. However, you can observe the tree trunk decaying within weeks.
Step 4:
Once you realize the stump has completely dried, you can start to remove it. Take out all the copper nails first; spikes or nail pullers are helpful to do this.
Conclusion
And there you have it! There are many different ways to remove a tree stump, each with its own benefits. So, follow our guide to get that stubborn stump out of your life for great results!
![Best Walk Behind Wheeled String Trimmer Reviews [year]](https://properlyrooted.com/wp-content/uploads/2022/10/Best-Walk-Behind-Wheeled-String-Trimmer-Reviews-150x150-1.png)