Growing Vanilla: A Sweet Guide
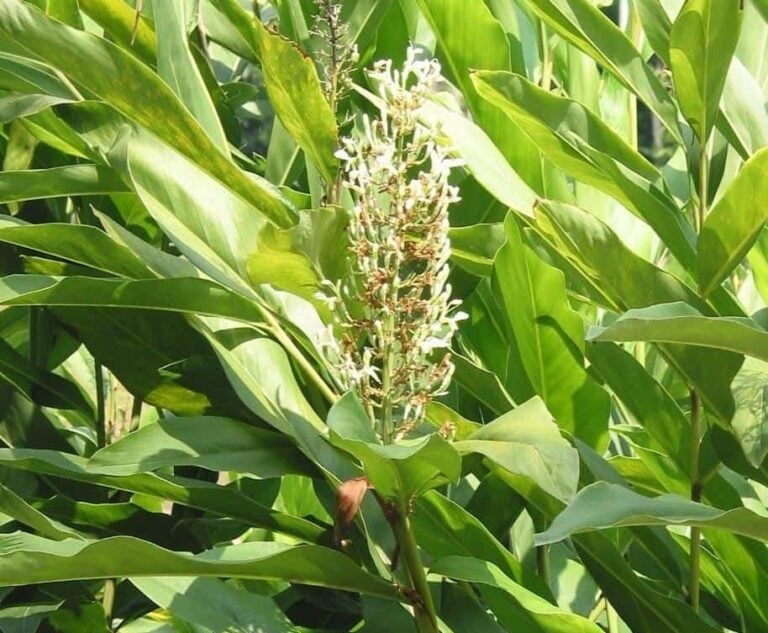
Vanilla is actually part of the orchid family (Orchidaceae) and it takes some patience, time, and skill to grow it but there are definitely rewards. Typically, it takes 3-5 years to get a mature plant. The flavor comes from the long slender seed pod.
Most vanilla comes from Mexico, where it’s a native plant. The vine will often be found climbing up a tree. For home gardeners, it should be noted that the vanilla vine doesn’t grow quickly, and if it’s being grown indoors it needs a pole or piece of wood or something for the vine to anchor onto and climb.
The vine needs to get around 10 feet tall before it will flower and you can harvest the seeds for making extract, so it needs a large space. A good overview of the growing process is found on the American Orchid Society website.
Purchasing Your Plant
It’s important to purchase a plant from a reputable grower. If you can, try to find a mature plant already at least three years old.
You will also want to find or purchase a way for the vanilla vine to grow. A bamboo pole or piece of wood, or possibly even a lattice, should work well. Some gardeners train the vanilla vine to grow on a fence.
Planting Vanilla
Because vanilla really likes warm temperatures, it’s a good idea to grow it in a pot unless you live in Florida, Mexico, South America, or Hawaii, or somewhere that the nighttime temperatures are not less than the mid 60’s. If this temperature goes below 55 the plant may die.
The vanilla plant likes warmth, high humidity and indirect sun.
To grow the plant indoors you will need a large, sunny room or preferably a greenhouse with plenty of area for the long vine.
Choose a pot this isn’t too much bigger than your plant. When re-potting from the store container, do not pull the vanilla out by its stem, which is delicate. Gently pull out the root ball and place it in your container.
The container you use should be filled with a soil suitable for growing orchids, and you might want to use some bark and/or moss. Look for media specifically designed for growing orchids, not just any dirt. Coconut husk, known as coir, makes a good media for growing orchids, and you can find special orchid bark at garden stores.
Start with the pot half-filled with media, then add the pole. Gently add your plant and fill it the rest of the way with media. You will want to wrap the vine around the pole and secure it carefully.
A good method for keeping the vine moist is to train some sphagnum moss around the pole or piece of wood. Another great resource is the American Orchid Society, which features solid recommendations for every aspect of growing orchids, from the right mix of organic and inorganic growing media to containers, poles, and more.
How to Care for Your Vanilla Plant
Water is very important for the health of the vanilla. Make sure there is always plenty of water in the pot and the soil is moist but not dripping. Lightly mist the plant every other day or so.
Fertilizer is critical. You will want to fertilize using orchid fertilizer, in the spring and summer every couple of weeks.
The Pollination Process
Vanilla is harvested from the flower, so the plant must have pollination to produce a flower. Pollination can be a tricky process. Unless you can train a bee to do it, your best bet is to learn how to do it yourself.
The vanilla vine can be pollinated by hand. You can get a better idea of how the pollination process works below.
The vanilla flowers are only open for one day. They will open early in the morning and by afternoon they will close. You will want to pollinate within the first few hours after they have opened. You will need a toothpick.
The reproductive parts of the flower are inside it, so you will need to tear open the flower. When you get it open, look for a flap which covers the female parts. The male part of the flower will be folded down over that flap. The male part has the pollen. Use the toothpick to lift the flap up and push the pollen into contact with the female part of the flower.
Another method for pollinating is to simply use your hands, and this is explained in detail on the American Orchid Society website.
If you have done this correctly the pods will start forming within a week. The pods will begin to swell, forming the beans. The vanilla beans will be ready to harvest in 8-9 months.
Propagating Vanilla Orchids
Propagating vanilla orchids can be a bit tricky. The following clip from Green Garden Guy will be helpful. It’s important not to get the sap on your skin, as it will burn.
Cut a length of the vine. Get a large bucket and fill it with media specific to orchids. Cut off a length 6-8 inches long and put the bottom few inches into the media. Fill the pot with water and put it in a partially shaded area. After about 6 months, empty the pot and look for the roots.
Curing the Vanilla Beans
Once you have successfully pollinated, that’s not the end of the process. The seed pods must be cured before they can be used. One method is to simply let the bean cure while still on the vine.
Another method is to take them from the vine, blanch them for a few minutes in boiling water, then wrap them and store them in a cool dry location at night. In the day, place them in the sun, then re-wrap them and store them in a cool dry place at night. Do that for two months. Then store them in a sealed box for several months.
When the bean is ready, it should be sliced open and the vanilla scraped out for use in recipes. Placing it in alcohol will result in homemade vanilla extract.
Photo by bineshab licensed under CC0
Also Read: Yucca Plant